Accounts, invitations, and profile security
Create accounts through the people workflows or an import. The administrator provisions an account and sends an invitation. There is no public registration.
Invite a person
There is no separate invite form. The invitation goes out when you create the person.
- Create the person from Teachers, Parents, Students, or Admins, or import them.
- Enter a valid email address. The application sends the invitation to it.
- Ask the person to open the link and set a password.
- Check Account invitations to see that the invitation was accepted.
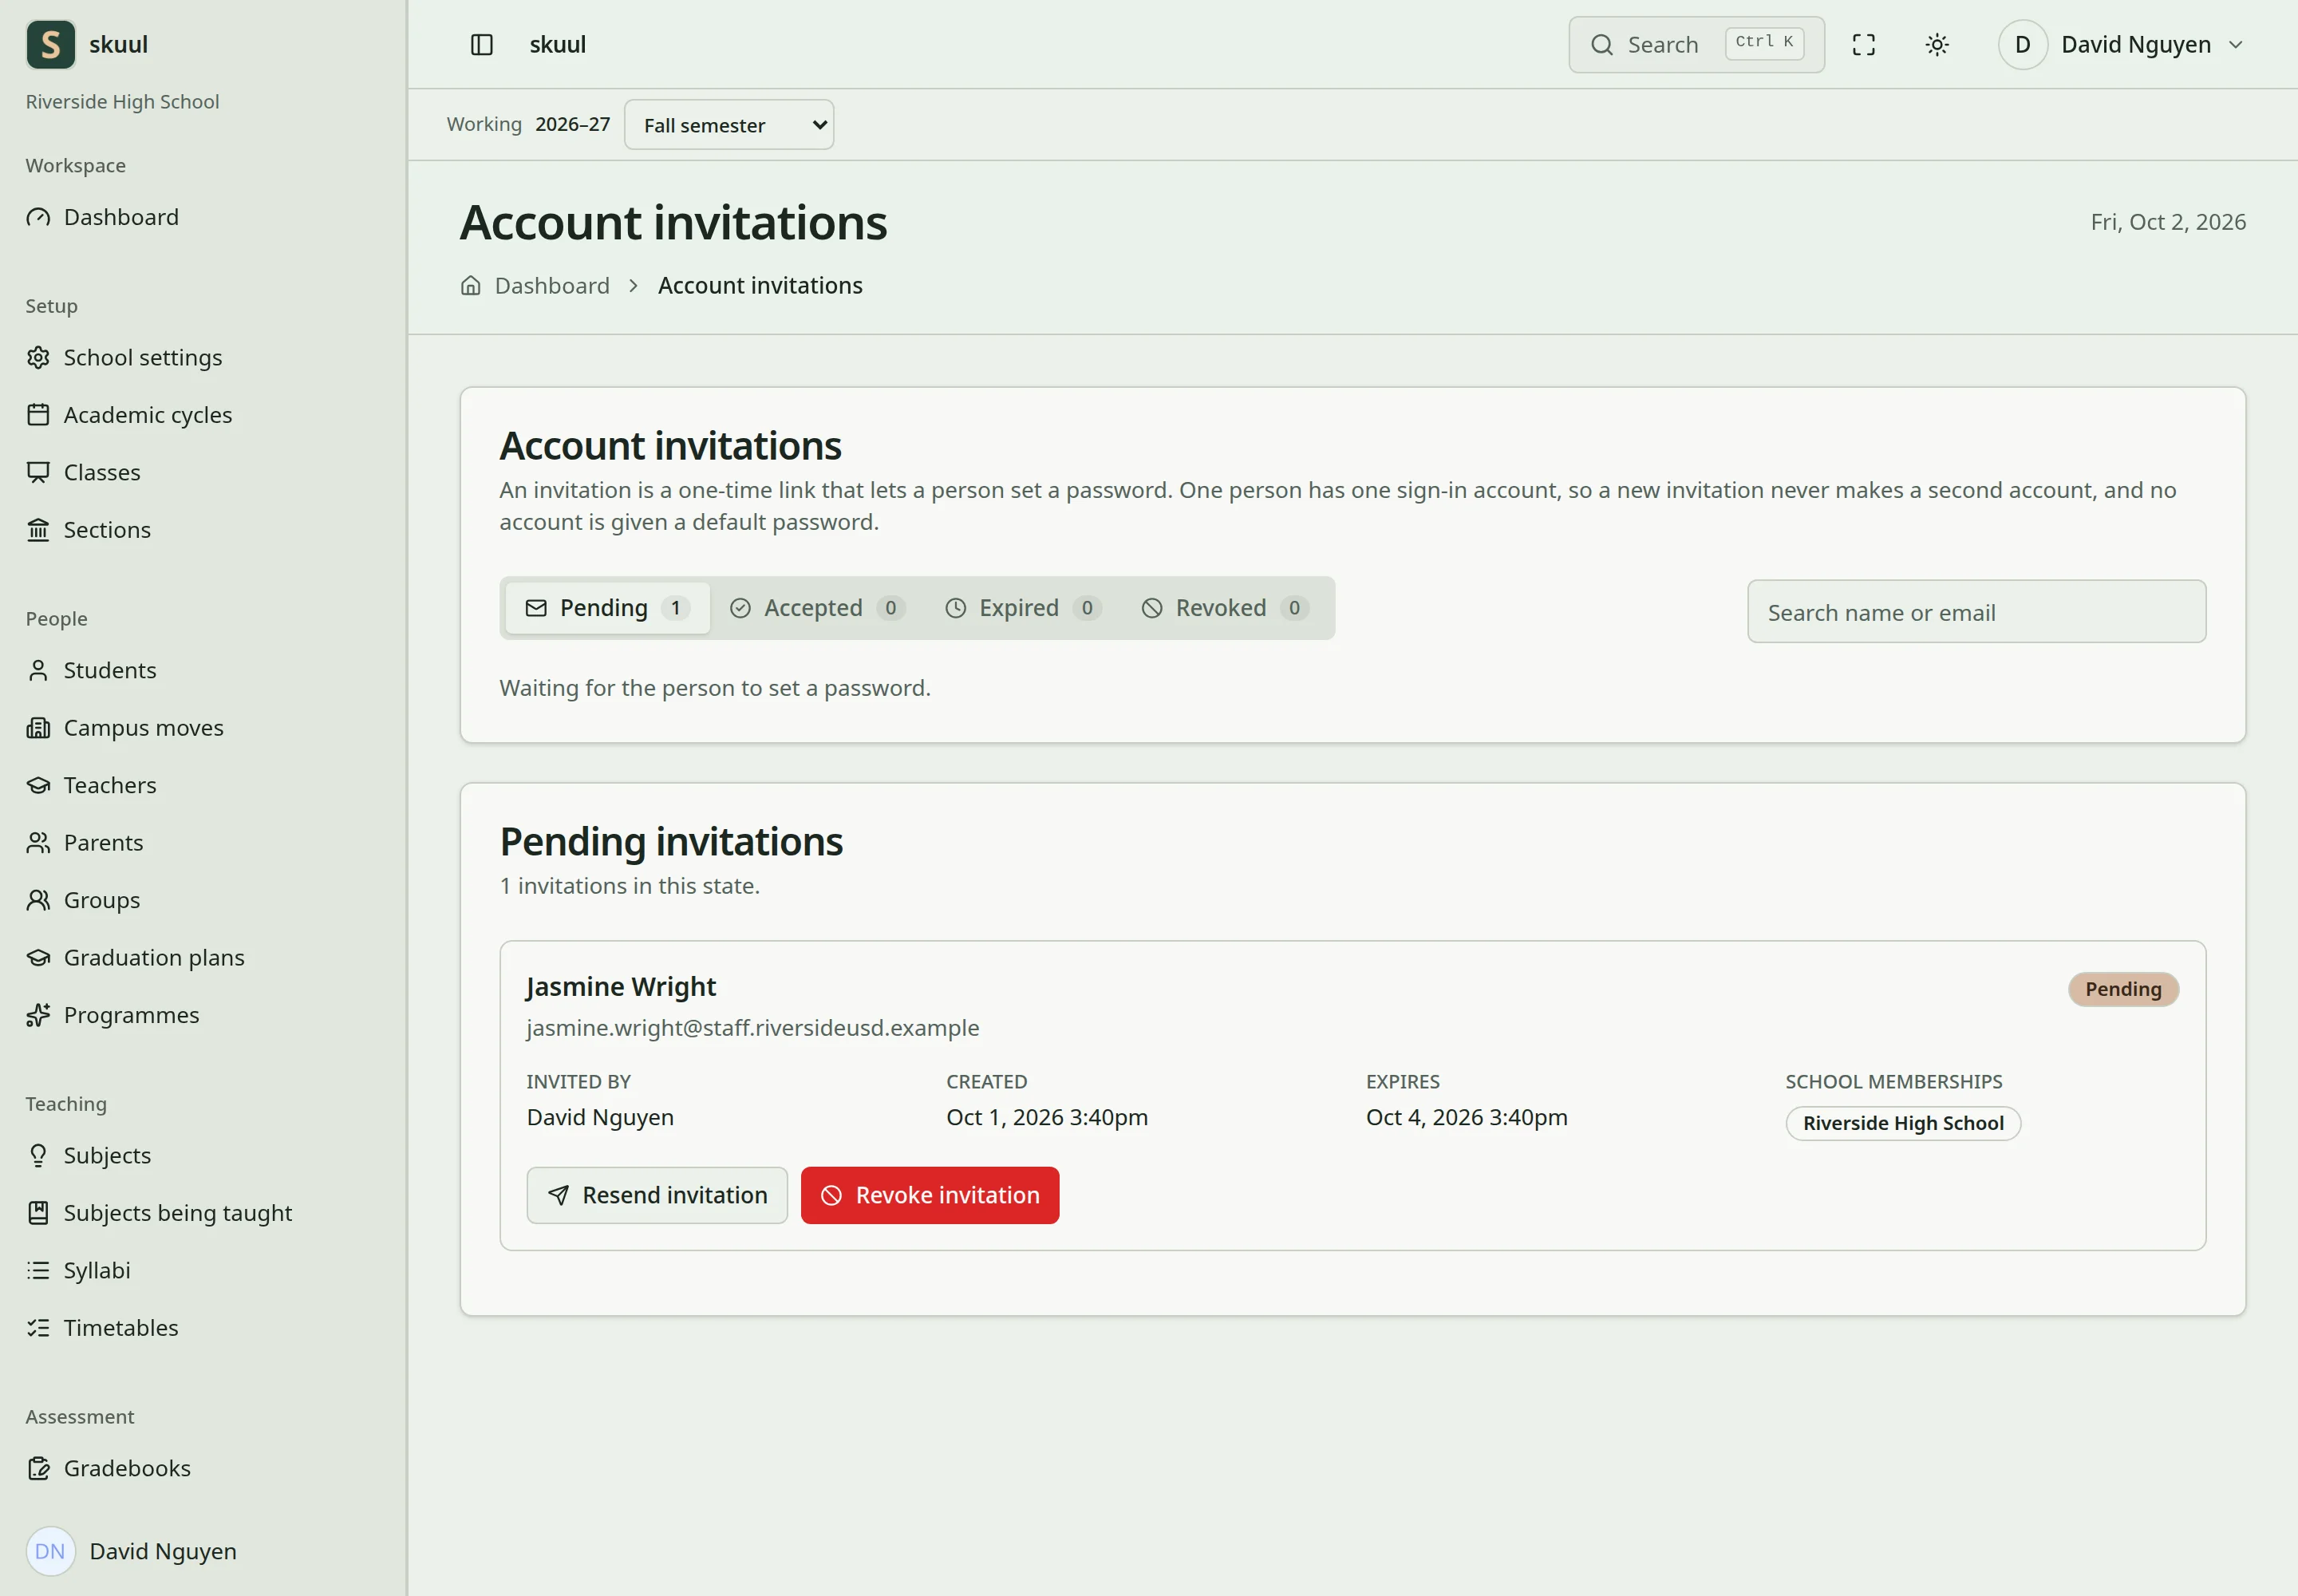
A new invitation replaces earlier unused links.
To send the link again, open the person's profile. Select Manage [person]'s account, then Send invitation or Resend invitation.
By default, the application checks that the email domain can receive mail. The operator can turn this check off with CHECK_EMAIL_DOMAINS=false. If the email belongs to a known account, the application reuses that account. Provisioning fills missing profile information. It does not replace existing values.
Invitations expire after 72 hours by default. The operator can change this interval. Each link can be accepted once. An archived account cannot receive an invitation. A suspended account cannot accept an invitation. Reinstate the account first.
Manage access
Account states are Invited, Active, Suspended, and Archived. Suspended and archived accounts cannot access the application. Campus memberships have their own status and role assignments. Check both levels when a person cannot enter a campus.
An authorized administrator can set an account password and require a password change. Share credentials through the organization's approved process. Use password reset for normal self-service recovery.
Use profile security
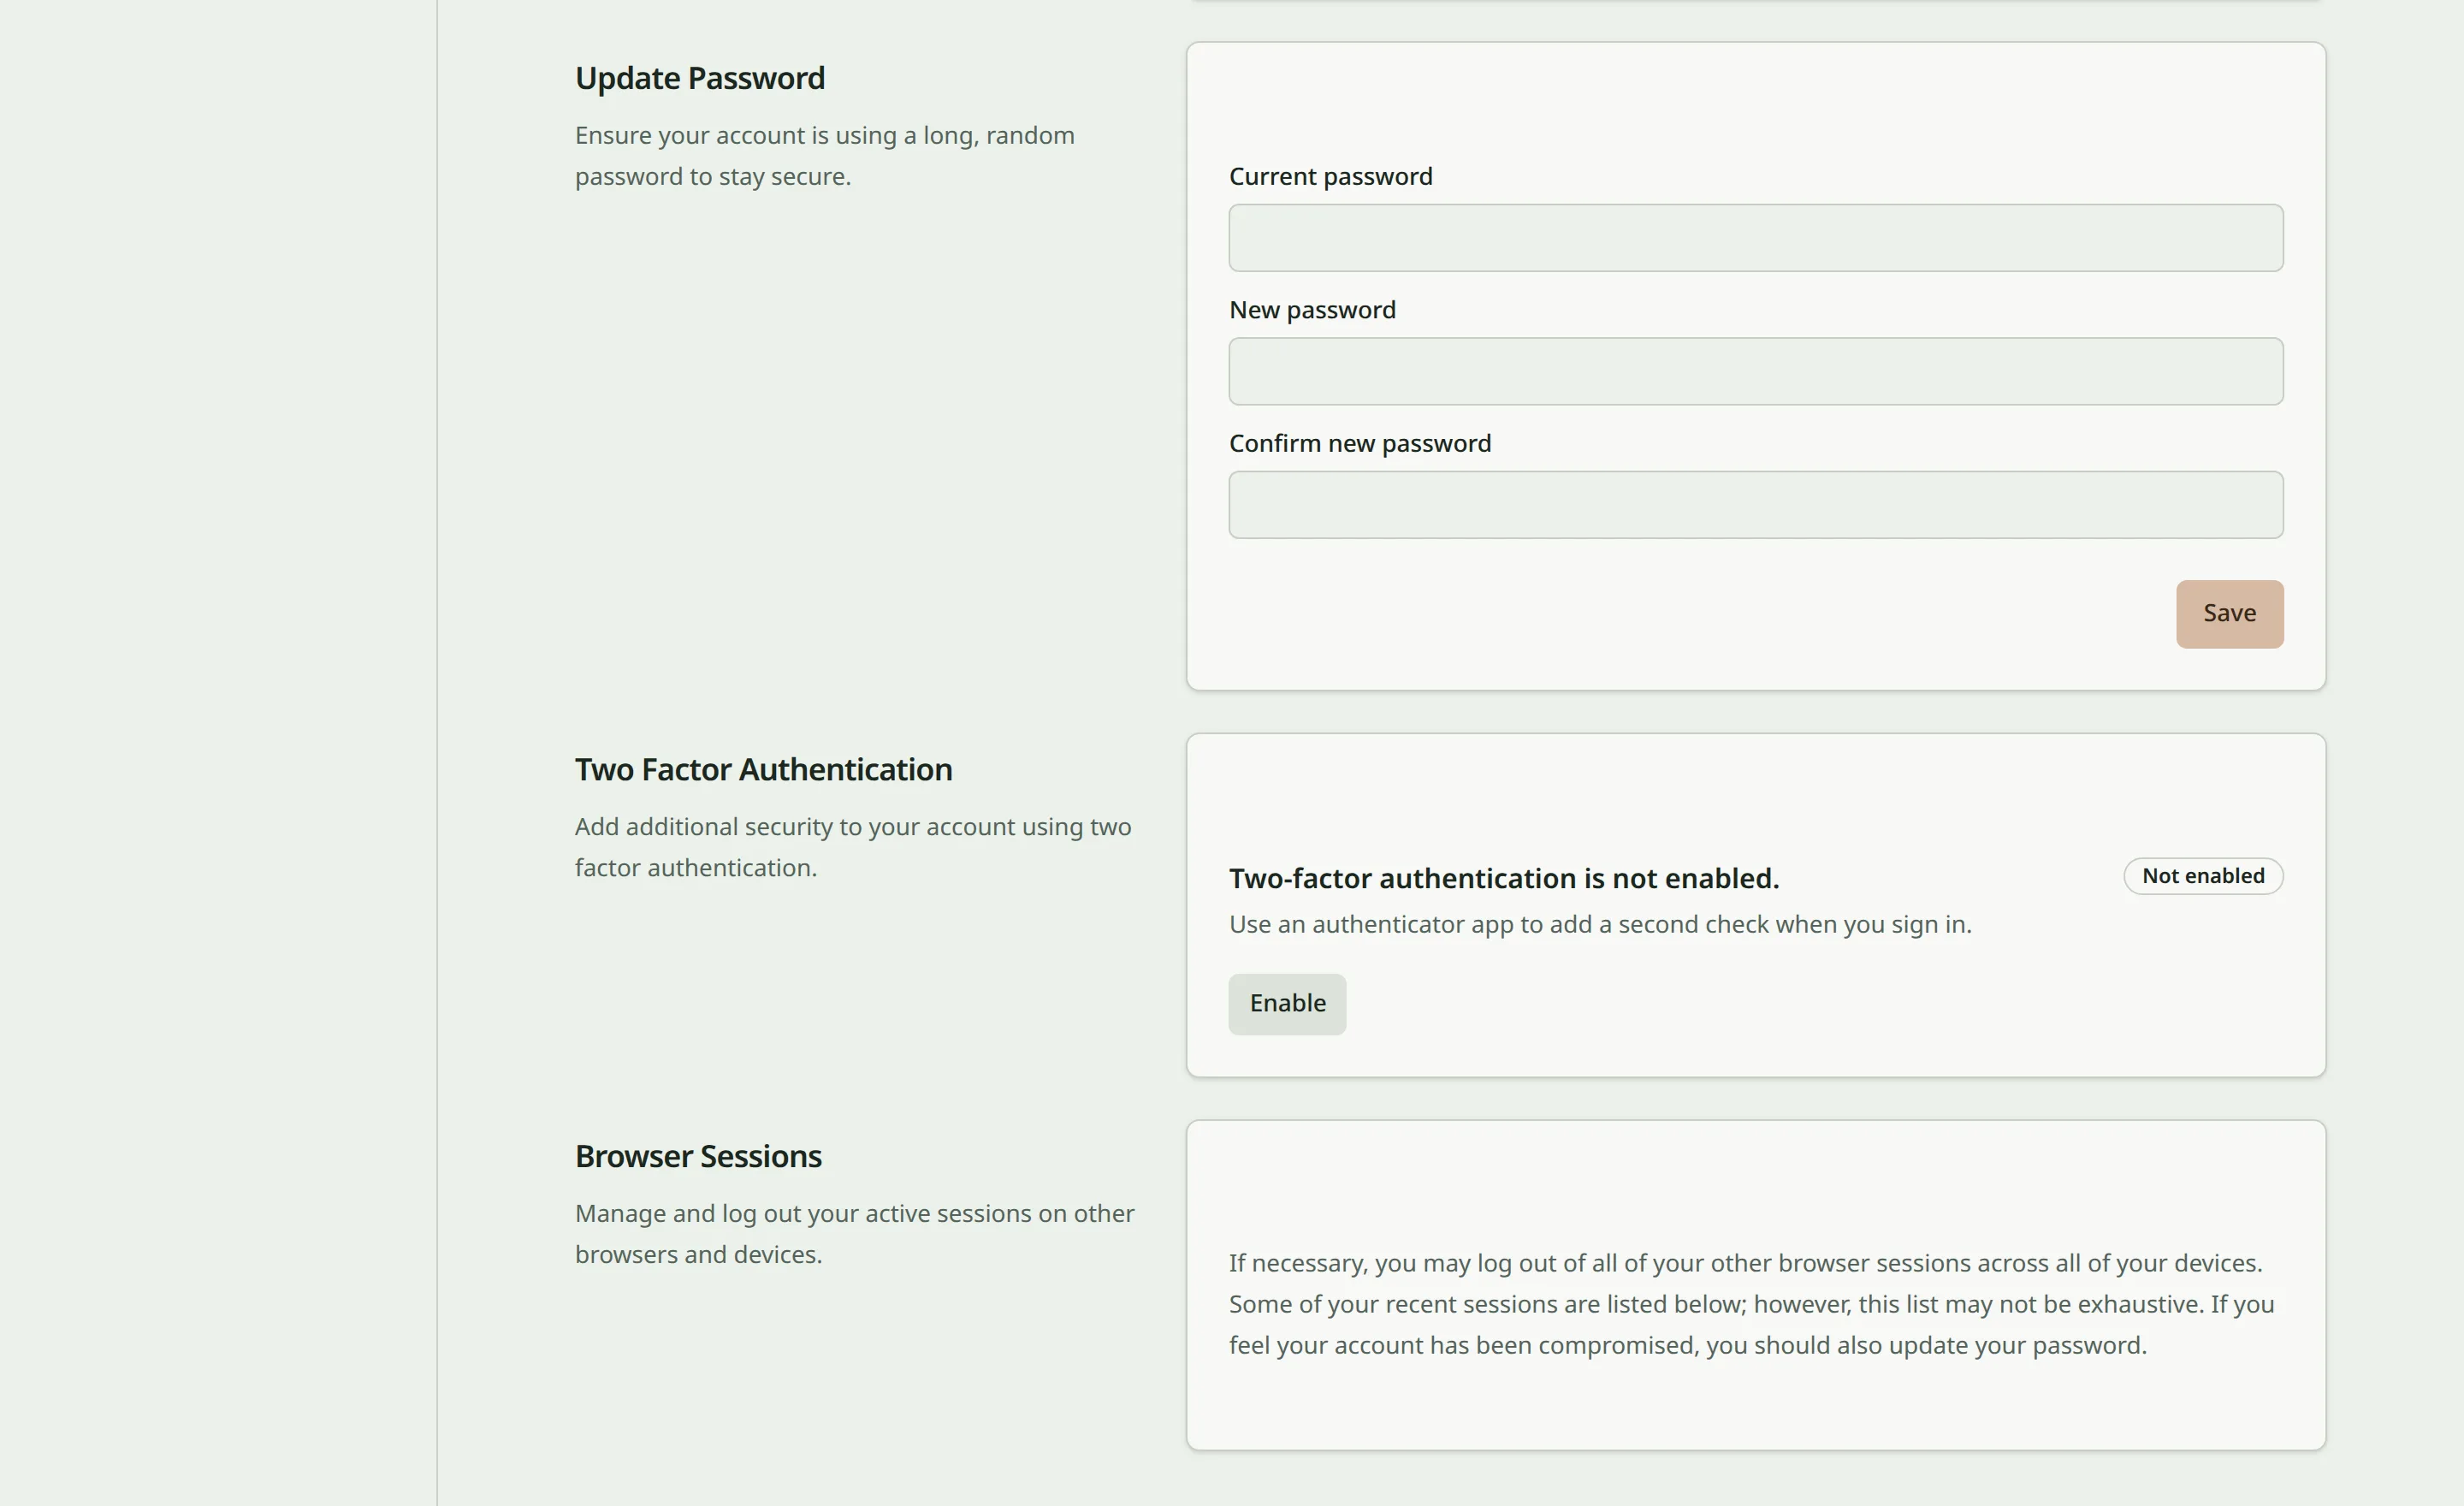
Open your profile from the account menu at the top right.
Open the account profile to update supported profile fields and the password. Complete email verification when requested. Enable two-factor authentication and confirm it with a valid code. Store recovery codes where you can retrieve them without this device. Review browser sessions and end sessions that you do not recognize.
Profile photos use public storage. The application does not enable Jetstream API tokens or teams.
Replace an invitation link
Use manage account access in the person's campus for account access controls. The policy blocks managing your own account or a person with broader authority. Organization and platform invitation visibility have separate scope checks.
- Open Account invitations.
- Select Pending and search by name or email.
- Check the recipient, inviting person, campus memberships, and expiry.
- Select Resend invitation for an eligible pending invitation.
- Ask the recipient to use the new email link.
The replacement revokes earlier unused links. Acceptance is a one-time operation. The list also has Accepted, Expired, and Revoked tabs. Read the disabled-action reason when a row cannot be resent or revoked. For an expired link, open the person's account controls and issue an eligible new invitation. Select Revoke invitation to stop an unused link. Revoking a link does not remove an already active person's roles or suspend their account.
Suspend, archive, or reinstate an account
- Open the person's profile. Teacher, parent, learner, and administrator profiles all have the menu.
- In Sign-in, select ⋯ (Manage [person]'s account).
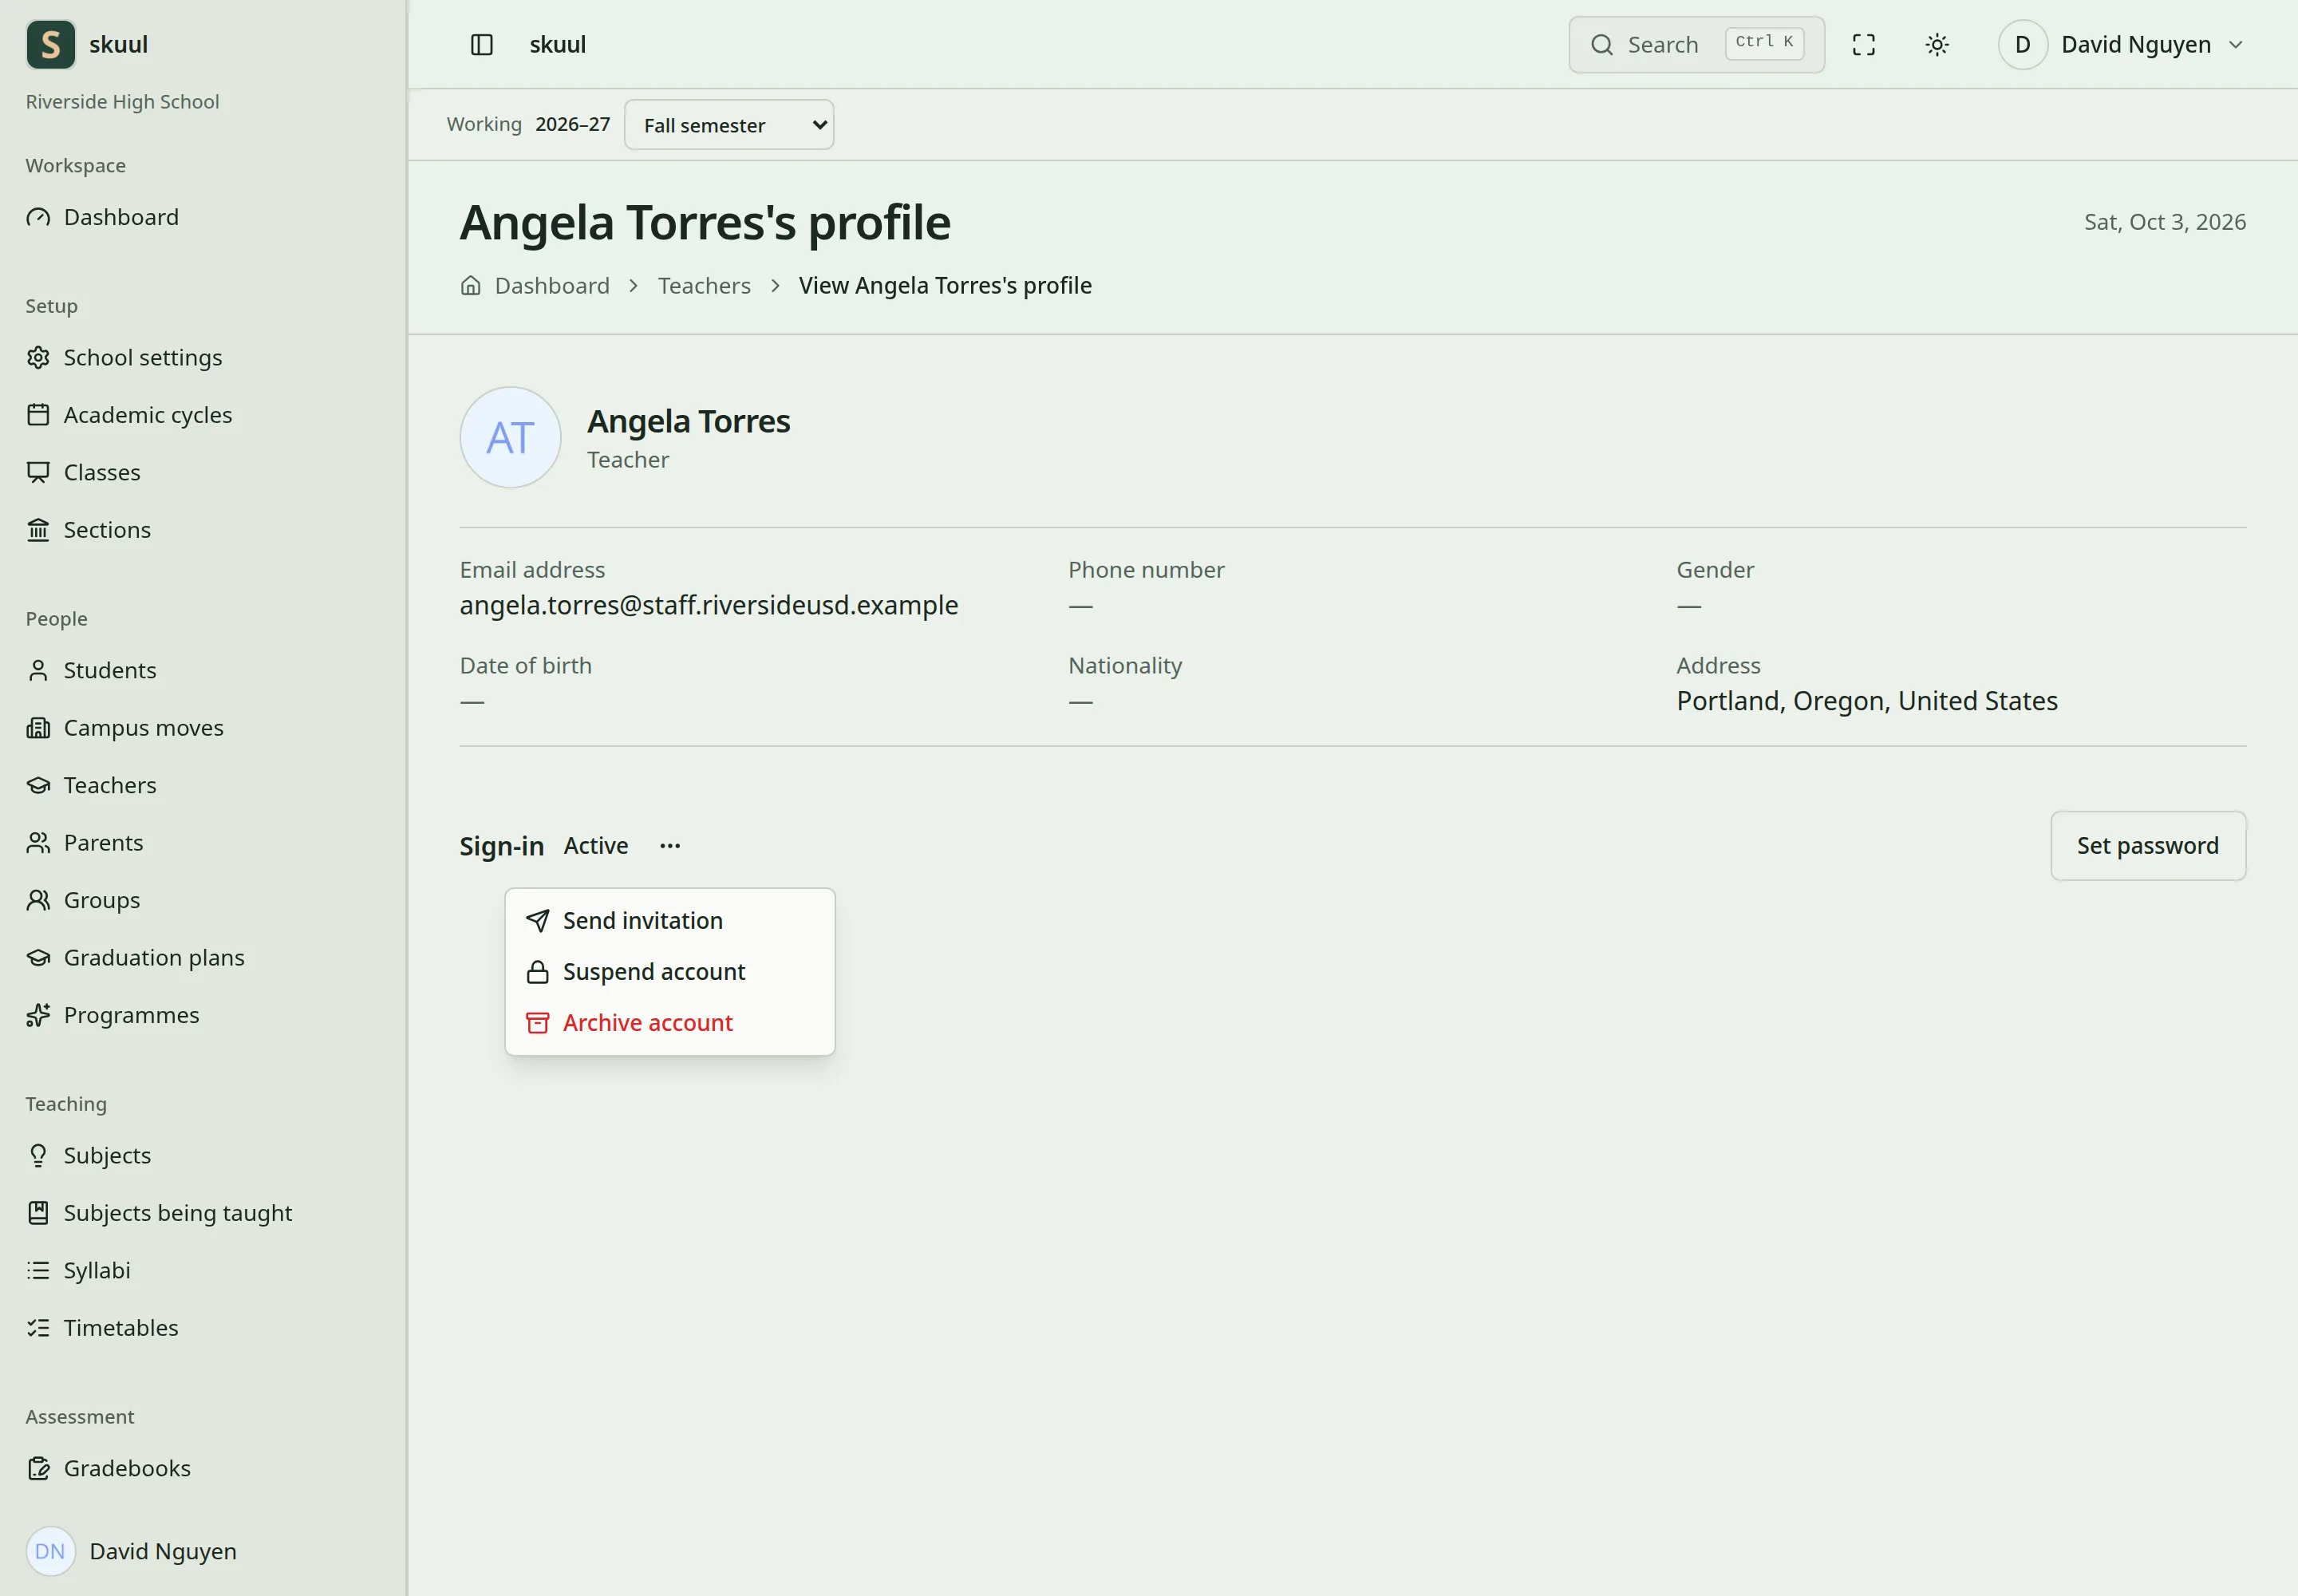
The account menu sits beside the account status in Sign-in.
Select Suspend account or Archive account, then read and confirm the sign-in effect. These actions block the person's account across campuses and end active access. Use Reinstate account when the account should return to use. Review campus membership and role assignments separately. Do not suspend a whole account merely to end access to one campus.
Set a password for another person
- Open the person's profile and find Sign-in.
- Select Set password.
- Enter matching New password and Confirm password values.
- Select Change it at next sign-in when required.
- Select Set password and read the confirmation.
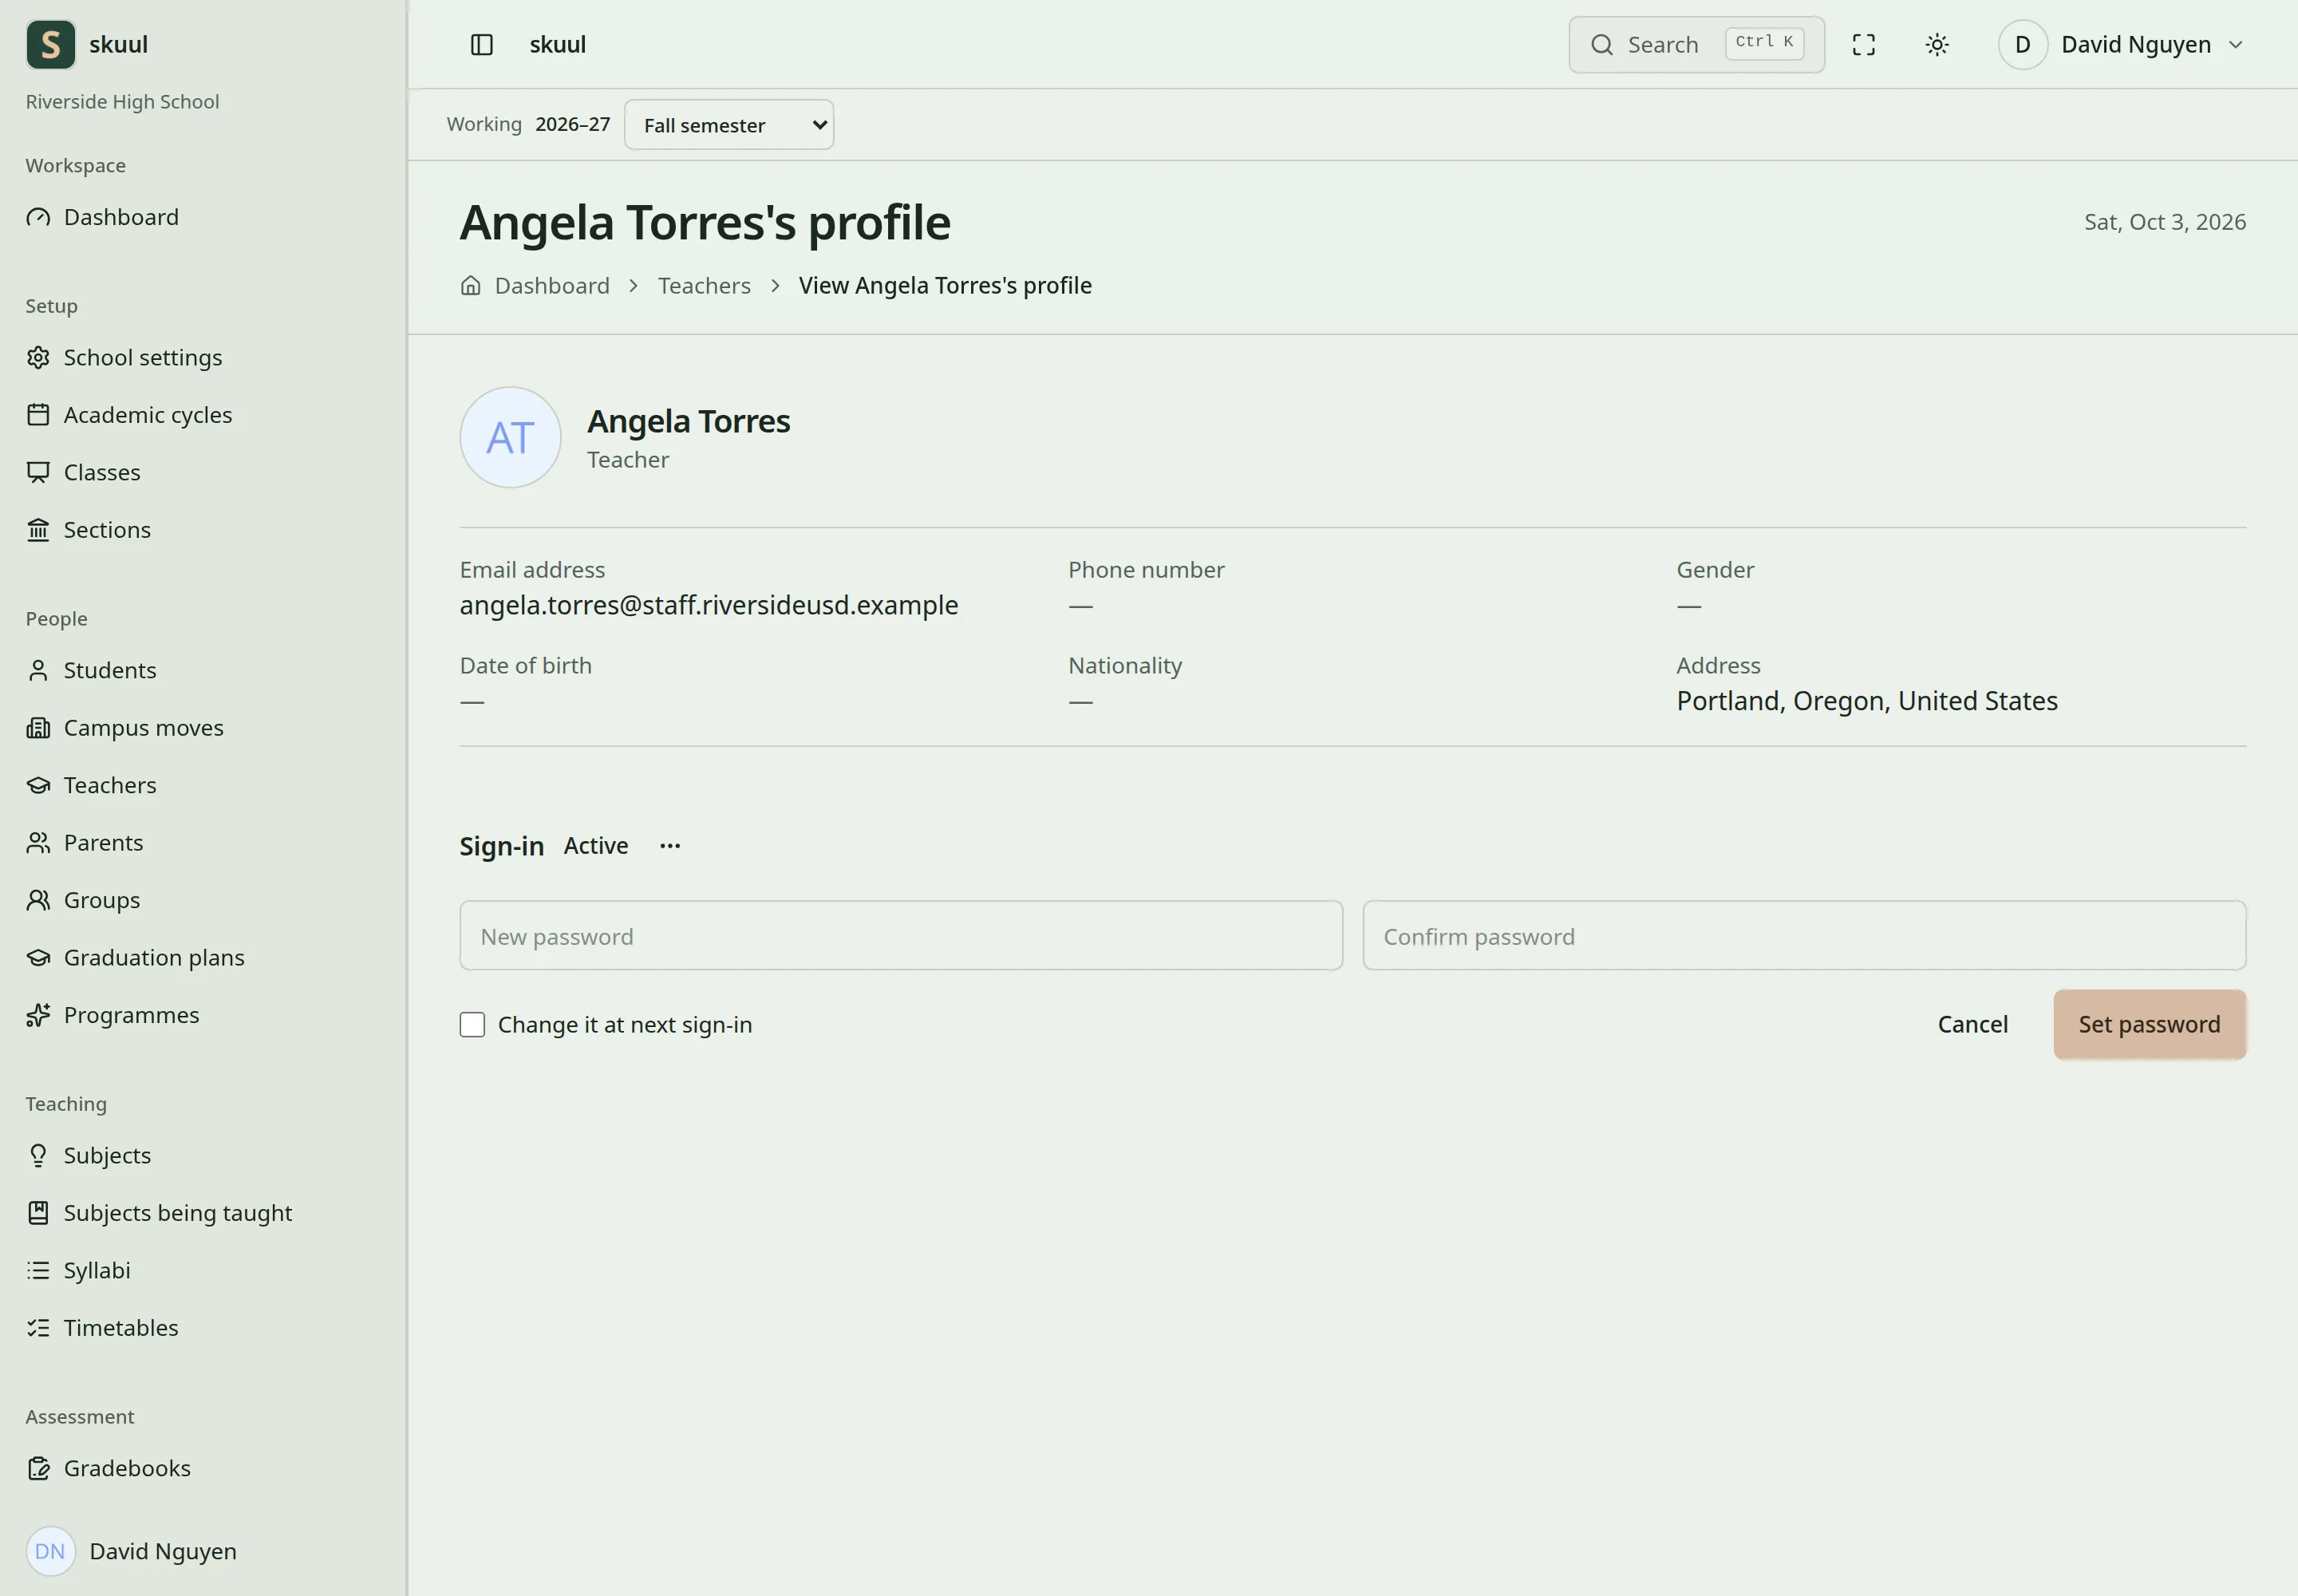
The form opens in place, under Sign-in.
The form applies the configured Fortify password rule and confirmation requirement. The checkbox reflects the account's existing forced-change state. Use the person's self-service password reset for ordinary forgotten-password recovery.
| Problem | Action |
|---|---|
| Old invitation link fails | Use the most recently issued link and check its expiry. |
| Invitation accepted but sign-in blocked | Check Suspended or Archived account state and required password change. |
| Account signs in but cannot select a campus | Check the person's active campus membership. |
| No Sign-in section or account menu on a profile | Check manage account access, the person's campus membership, and their authority. You cannot manage your own account here. |
| Invitation email does not arrive | Check the recipient address, mail delivery, and worker configuration with the operator. |
Check the result
- Check the invitation recipient, expiry, and acceptance state.
- Confirm the person can sign in with their active account after acceptance.
See troubleshooting for blocked sign-in and expired links.
Follow staff access review when a person joins, changes duties, leaves, or returns.