Campus settings and setup
Use Organization → Schools to create or open a campus. Then use its setup checklist and Setup → School settings. You need the relevant school management permissions.
Complete campus setup
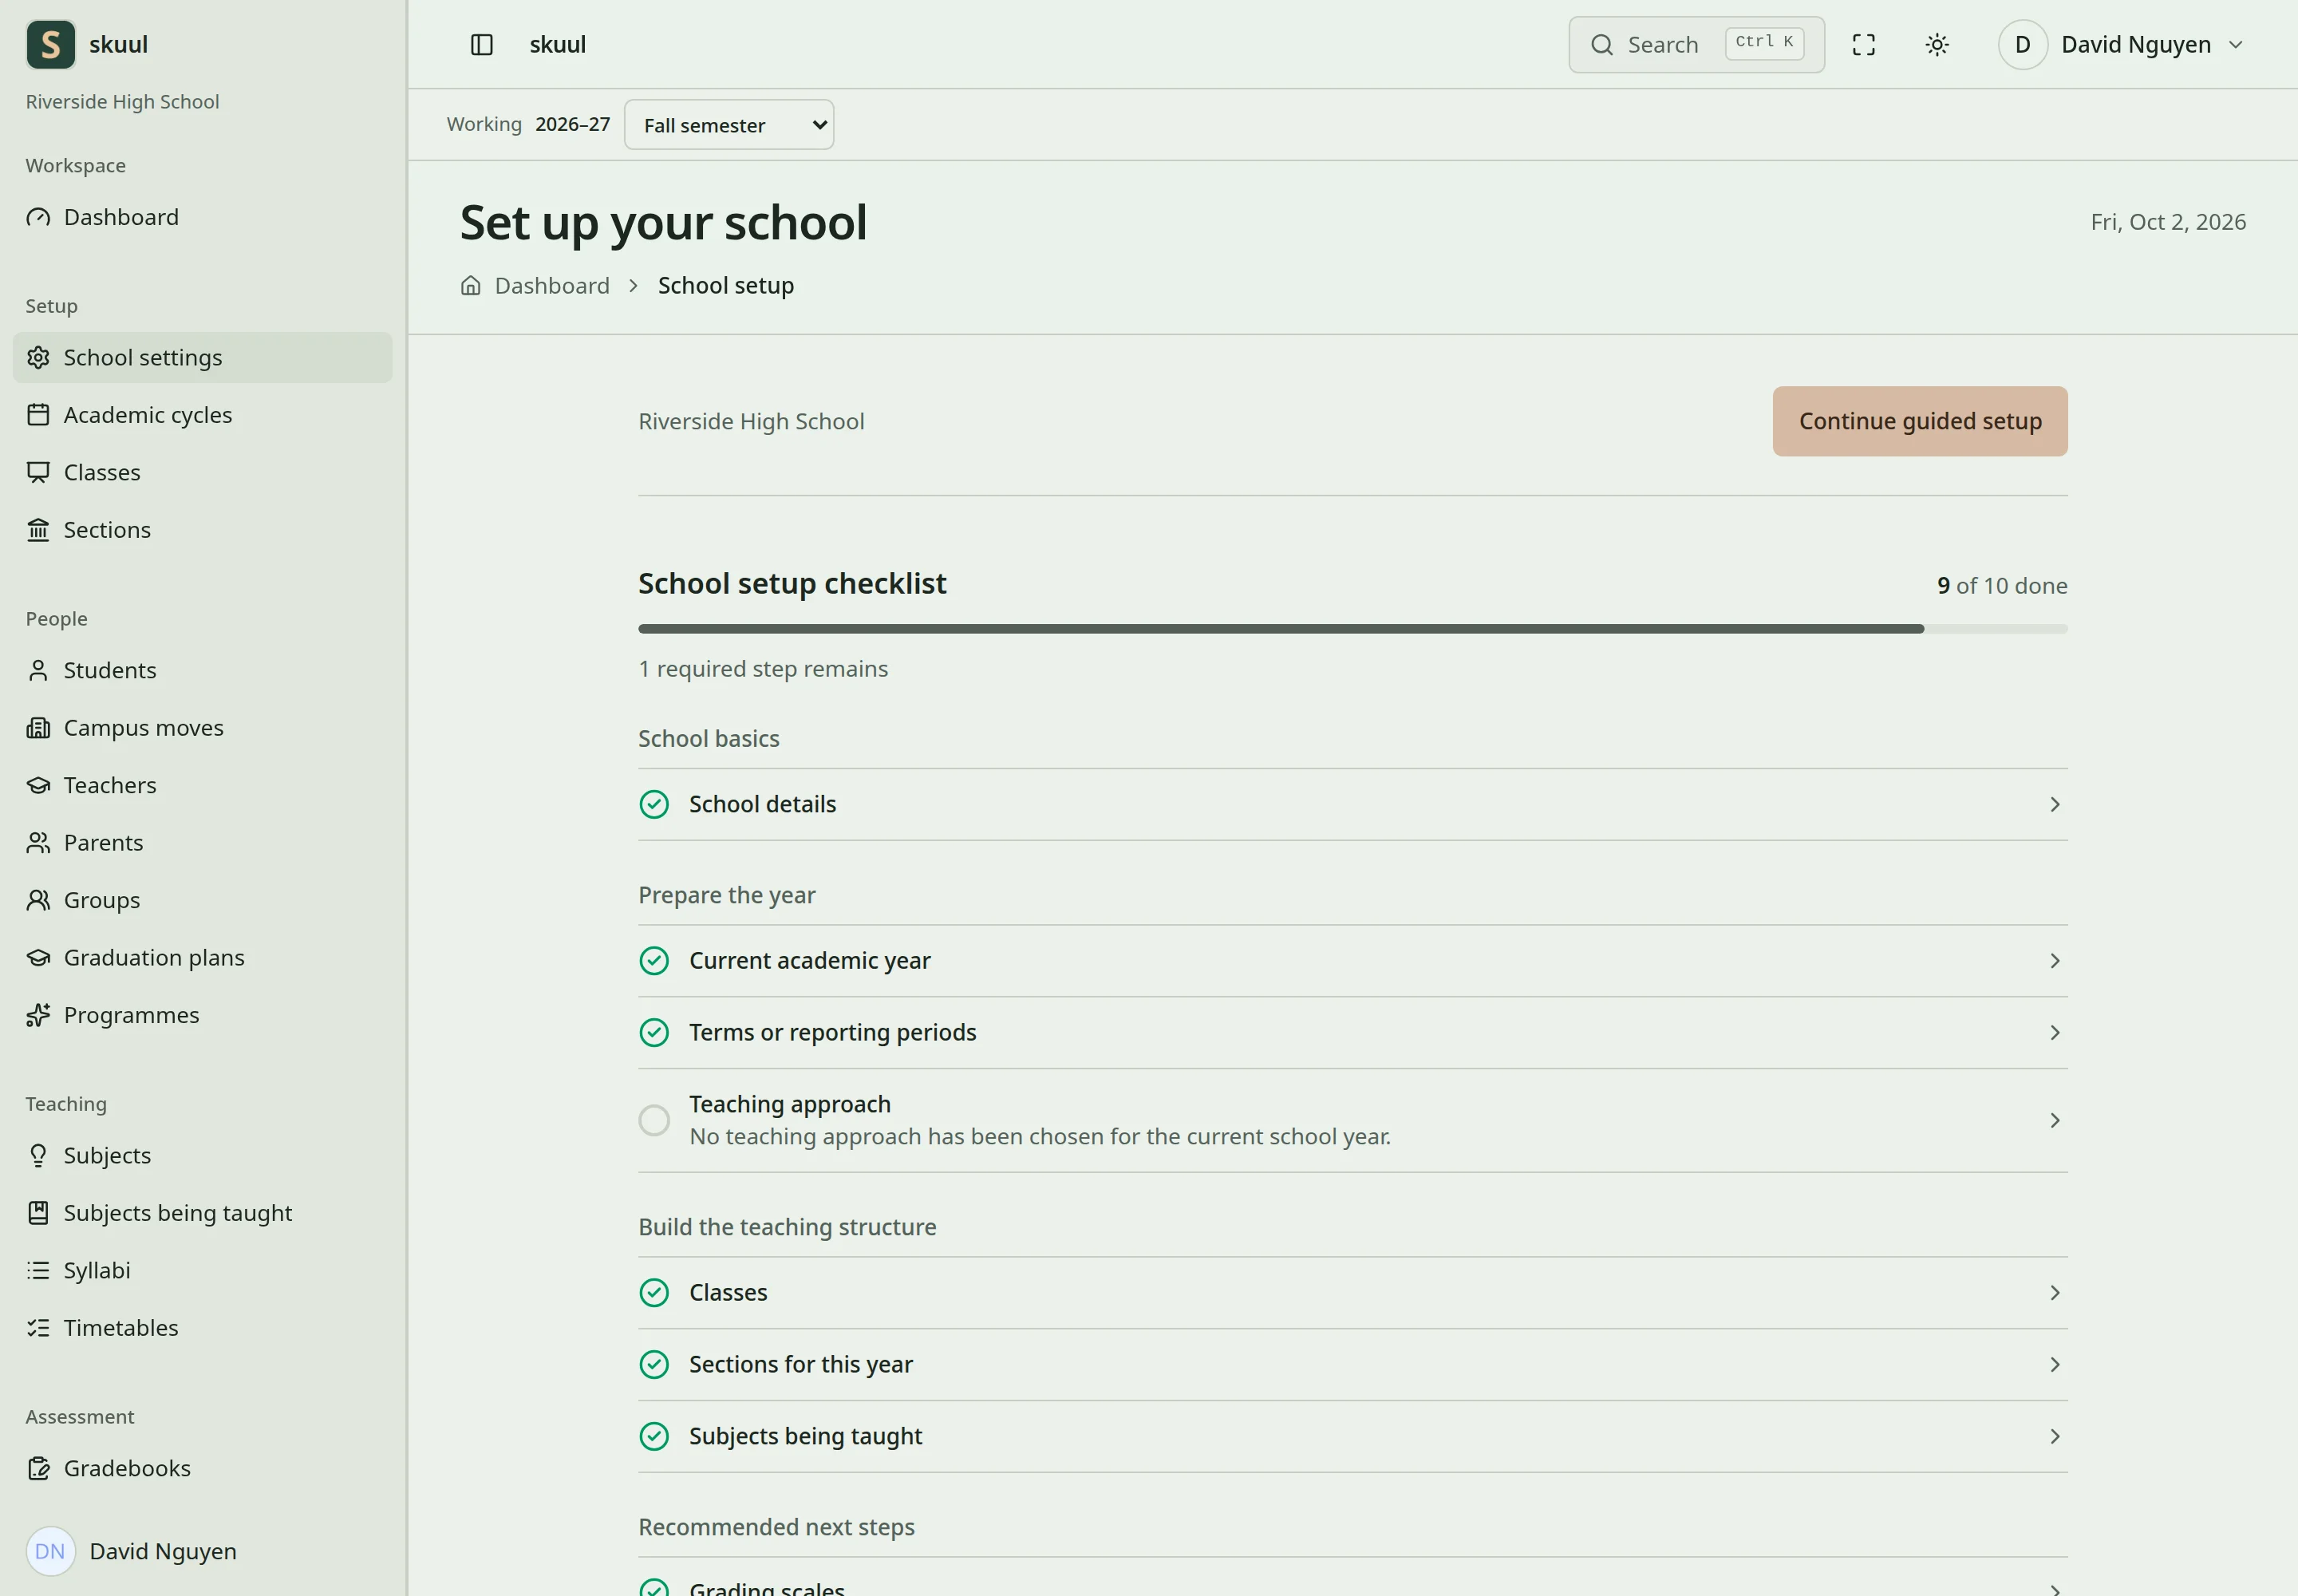
Each open step says why it is open and links to the screen that finishes it.
- Check the campus name, contact details, and organization.
- Select the terminology profile and campus time zone.
- Configure optional features.
- Create the academic calendar and structure.
- Set the teaching model for the cycle.
- Add people and their access.
- Create subjects, offerings, and teaching assignments.
The terminology profile changes labels. It does not select the teaching model. The presets use home section, subject schedule, or hybrid terminology. Custom level and section labels appear in forms and navigation.
Configure family access
Enable the Portal feature. Ask the operator to review area settings before inviting families. The current feature screen switches whole features; it has no separate portal-area editor. The areas include results, attendance, timetables, calendar, notices, invoices, documents, requests, library, boarding, graduation, programmes, and syllabi. An area can also require its own feature. For example, library access requires Library. The portal uses enrollment and guardian links to select records. It does not grant families a staff working-campus membership.
Retain operational history
Archive or close records through their own workflows. A feature switch hides an area and prevents its operations. It does not erase its records. A change to labels or settings does not replace existing placements or published results.
Review setup before admitting learners
Open the campus and select Edit school details. Check the organization, name, contacts, and time zone, then select Save changes. In setup, use Save and continue to return to the checklist. On the language and terminology page, select the preset or permitted label values. Select Save, or Save and continue to classes in setup.
Then complete the calendar, levels, sections, subjects, and teaching model for the intended cycle. Publish the dated calendar and activate sections before testing student creation. Assign teachers to offerings before testing gradebook editing. Test with an authorized campus staff account rather than relying only on platform access.
| Problem | Action |
|---|---|
| Today differs from the operator's expected date | Check the campus time zone and server time configuration. |
| Labels changed but roster choices did not | Terminology and teaching model are separate settings. |
| Setup appears complete but student admission has no section | Check the working cycle and section Active state. |
| Family area remains unavailable | Check Portal, the stored area flag, and any related feature. |
Check the result
- Review the campus name, organization, terminology, and time zone after saving.
- Confirm that the setup checklist reflects the completed steps.
See feature switches, academic calendars, and family access.