Gradebooks and grading scales
Use Assessment → Gradebooks, then open the intended course offering. The offering's roster determines the marksheet learners. Check the campus, academic period, subject, and roster before entering marks.
Access and prerequisites
| Task | Required campus permission | Additional requirement |
|---|---|---|
| Read a gradebook | read gradebook | update subject, or a teaching assignment to this offering. |
| Change structure or marks | manage gradebook | update subject, or a teaching assignment that has not ended. |
| Submit a result | publish result | Same assignment restriction as changing marks. |
| Review results | approve result | Campus ownership and separate reviewer rules. |
| Manage grading scales | manage grading scale | Work in the scale's campus. |
A former teacher retains reading access through their previous assignment. Their ended assignment does not allow further changes. The period must accept writes for marks and submission controls to operate. Closed and Archived periods reject these operations.
Set up assessments
- Open the offering's gradebook setup.
- Select Add a category when assessments need grouping.
- Enter Category name, Calculation, and Weight.
- Select Add category.
- Select Add an assessment.
- Complete the fields below and select Add assessment.
- Repeat until the structure matches the campus assessment policy.
| Assessment field | Requirement |
|---|---|
| Assessment name | Required. Maximum 150 characters. |
| Marked as | Numeric, grading scale, or comment-only. |
| Out of | Numeric items require a positive maximum, up to 999999.99. |
| Grading scale | Scale items require an active scale from this campus. |
| Weight | Positive value, up to 999999.999. |
| Category | Optional. Select a category from this offering. |
| Due (optional) | Optional date between 2000 and 2100. |
Category names are unique within the offering and accept up to 100 characters. Category weights must be positive. Comment-only assessments store text and do not affect numeric totals. Use Change and Save changes to correct an assessment. Review existing marks before using Remove.
Understand calculations
Each numeric item first becomes a fraction of its maximum. The calculator combines items within categories, then combines category results by category weight. Items without a category form one weighted group with group weight 1. Empty or fully excluded categories do not contribute to the total.
| Calculation | Effect |
|---|---|
| Weighted mean | Average item fractions using item weights. |
| Simple mean | Average item fractions equally. |
| Highest result | Use the highest item fraction. |
| Sum of points | Divide total earned points by total maximum points. |
For example, use two items: Quiz, 8 out of 10; Exam, 60 out of 100.
| Rule | Setup | Expected percentage |
|---|---|---|
| Weighted mean | Quiz weight 1; Exam weight 3 | 65%: (80 × 1 + 60 × 3) / 4. |
| Simple mean | Same items | 70%: (80 + 60) / 2. |
| Highest result | Same items | 80%. |
| Sum of points | Same items | 61.82%: 68 / 110 × 100. |
Raw point totals and the calculated percentage answer different questions. Do not divide displayed totals to reproduce a weighted percentage.
Record and correct marks
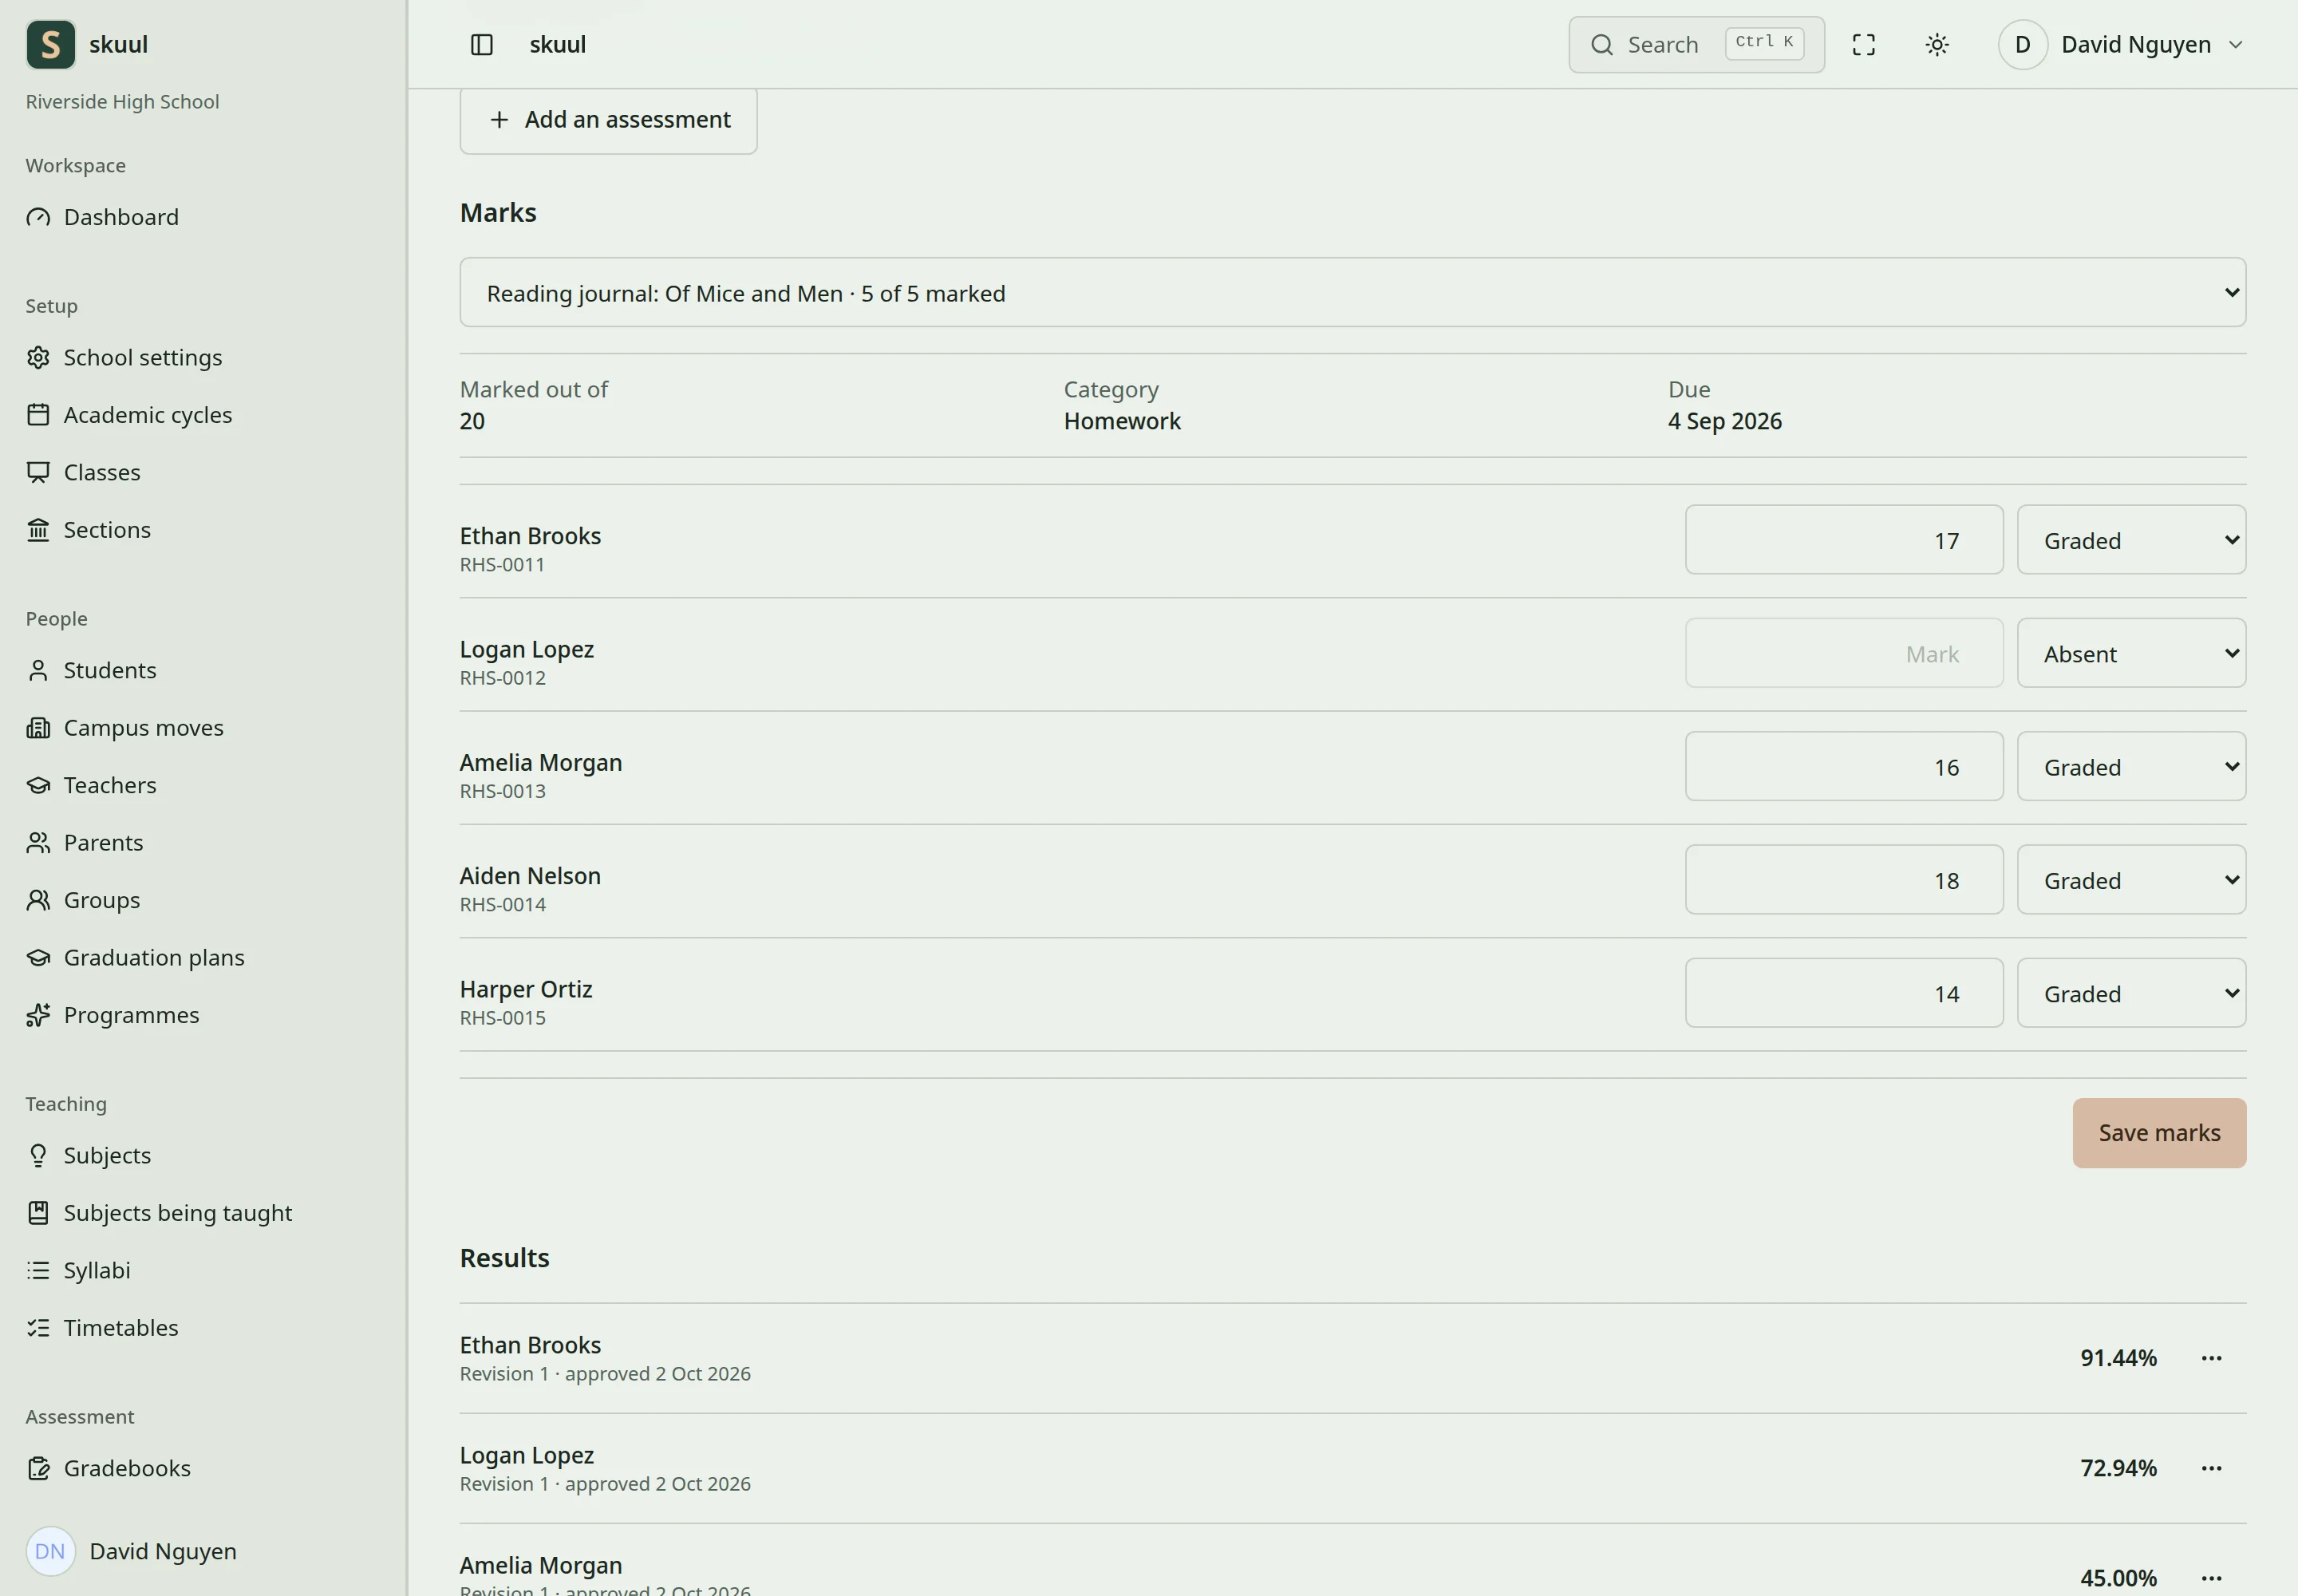
Review marks and entry states before submitting results.
- Select the assessment in Assessment.
- Select each learner's entry state.
- Enter the numeric mark or select the scale option for a Graded entry.
- Enter a comment when needed. Maximum 5000 characters.
- Select Save marks.
- Read the saved count and any row errors.
- Reload the sheet and confirm the saved marks.
| Entry state | Numeric calculation |
|---|---|
| Graded | Uses the entered mark, from zero to the item's maximum. |
| Missing, Absent, Incomplete | Counts as zero. |
| Exempt, Not applicable | Excludes the item and its maximum. |
| Not entered | Counts as zero until an entry is recorded. |
Example: Quiz 8/10 and an unentered Exam 0/100 give 20% under weights 1 and 3. Marking the Exam Exempt excludes it and gives 80%. A calculated zero does not confirm deliberate grading.
Unsaved changes prevent switching assessments. Save them or select Put back to discard them. Saving operates per changed learner. Valid rows can save while other rows show errors. If another person changed a mark, the row shows their latest value. Select Save marks again only after deciding to replace that value.
Reuse a template
Select Save as a template and provide a unique campus name, up to 150 characters. The optional description accepts up to 5000 characters. Select Save template. In an empty gradebook, choose Template and select Use template. The template copies categories and assessments; it does not copy learner marks. An existing assessment structure blocks template application.
Create or retire a scale
Open the grading-scale manager and select Create a grading scale. Enter Name, Basis, and any required Maximum GPA. Add between two and 50 options with unique labels. Numeric options must remain within the scale's permitted range. Descriptive options have no numeric value. Select Create the scale.
Use Stop offering it to prevent new assessments from choosing a scale. Use Offer it again to restore that choice. Retiring a scale retains its existing assessment records. Used scales restrict changes to their basis, maximum, and used options. Create a replacement when those restrictions prevent a policy change.
See result approval after verifying the calculation and all entry states.