Local installation
Use this guide for a new, disposable installation of the current development code. Use deployment for a production environment.
Prepare the checkout
Install Git, Docker with Compose, and a PHP runtime compatible with the locked Composer packages. Use PHP 8.5 and Composer 2 for the first install.
Clone the application and enter its directory:
shgit clone https://github.com/yungifez/skuul.git skuul cd skuulgit clone https://github.com/yungifez/skuul.git skuul cd skuulInstall the locked PHP dependencies with that PHP runtime:
shcomposer install --no-interactioncomposer install --no-interactionThis first install provides
vendor/bin/sail. Run later PHP, Composer, and Node.js commands through Sail.Copy the example environment file:
shcp .env.example .envcp .env.example .envSet
DB_DATABASE=skuulin.envbefore starting a new database volume. KeepDB_HOST=mysql,REDIS_HOST=redis, andQUEUE_CONNECTION=redis. The example usestesting, but the test suite can replace data there. Useskuulfor local application data andtestingfor tests.If a database volume already exists, changing
DB_DATABASEdoes not create a database or grant access. Create the database and grant the application user access before continuing.
Prepare the application
Start Sail:
shvendor/bin/sail up -d vendor/bin/sail composer check-platform-reqsvendor/bin/sail up -d vendor/bin/sail composer check-platform-reqsInstall and build the frontend:
shvendor/bin/sail npm ci vendor/bin/sail npm run buildvendor/bin/sail npm ci vendor/bin/sail npm run buildGenerate the application key, migrate, load country data, and link storage:
shvendor/bin/sail artisan key:generate --no-interaction vendor/bin/sail artisan migrate --no-interaction vendor/bin/sail artisan db:seed --class=WorldSeeder --no-interaction vendor/bin/sail artisan storage:link --no-interactionvendor/bin/sail artisan key:generate --no-interaction vendor/bin/sail artisan migrate --no-interaction vendor/bin/sail artisan db:seed --class=WorldSeeder --no-interaction vendor/bin/sail artisan storage:link --no-interactionGenerate a key only for a fresh installation. Keep the same
APP_KEYduring updates and recovery. The world seeder loads countries and states used by the installer. Allow time for it to complete.Open the application:
shvendor/bin/sail openvendor/bin/sail open
Complete the browser installer
Check that each installation requirement passes. If a check fails, use its action or follow its message, then reload the page.
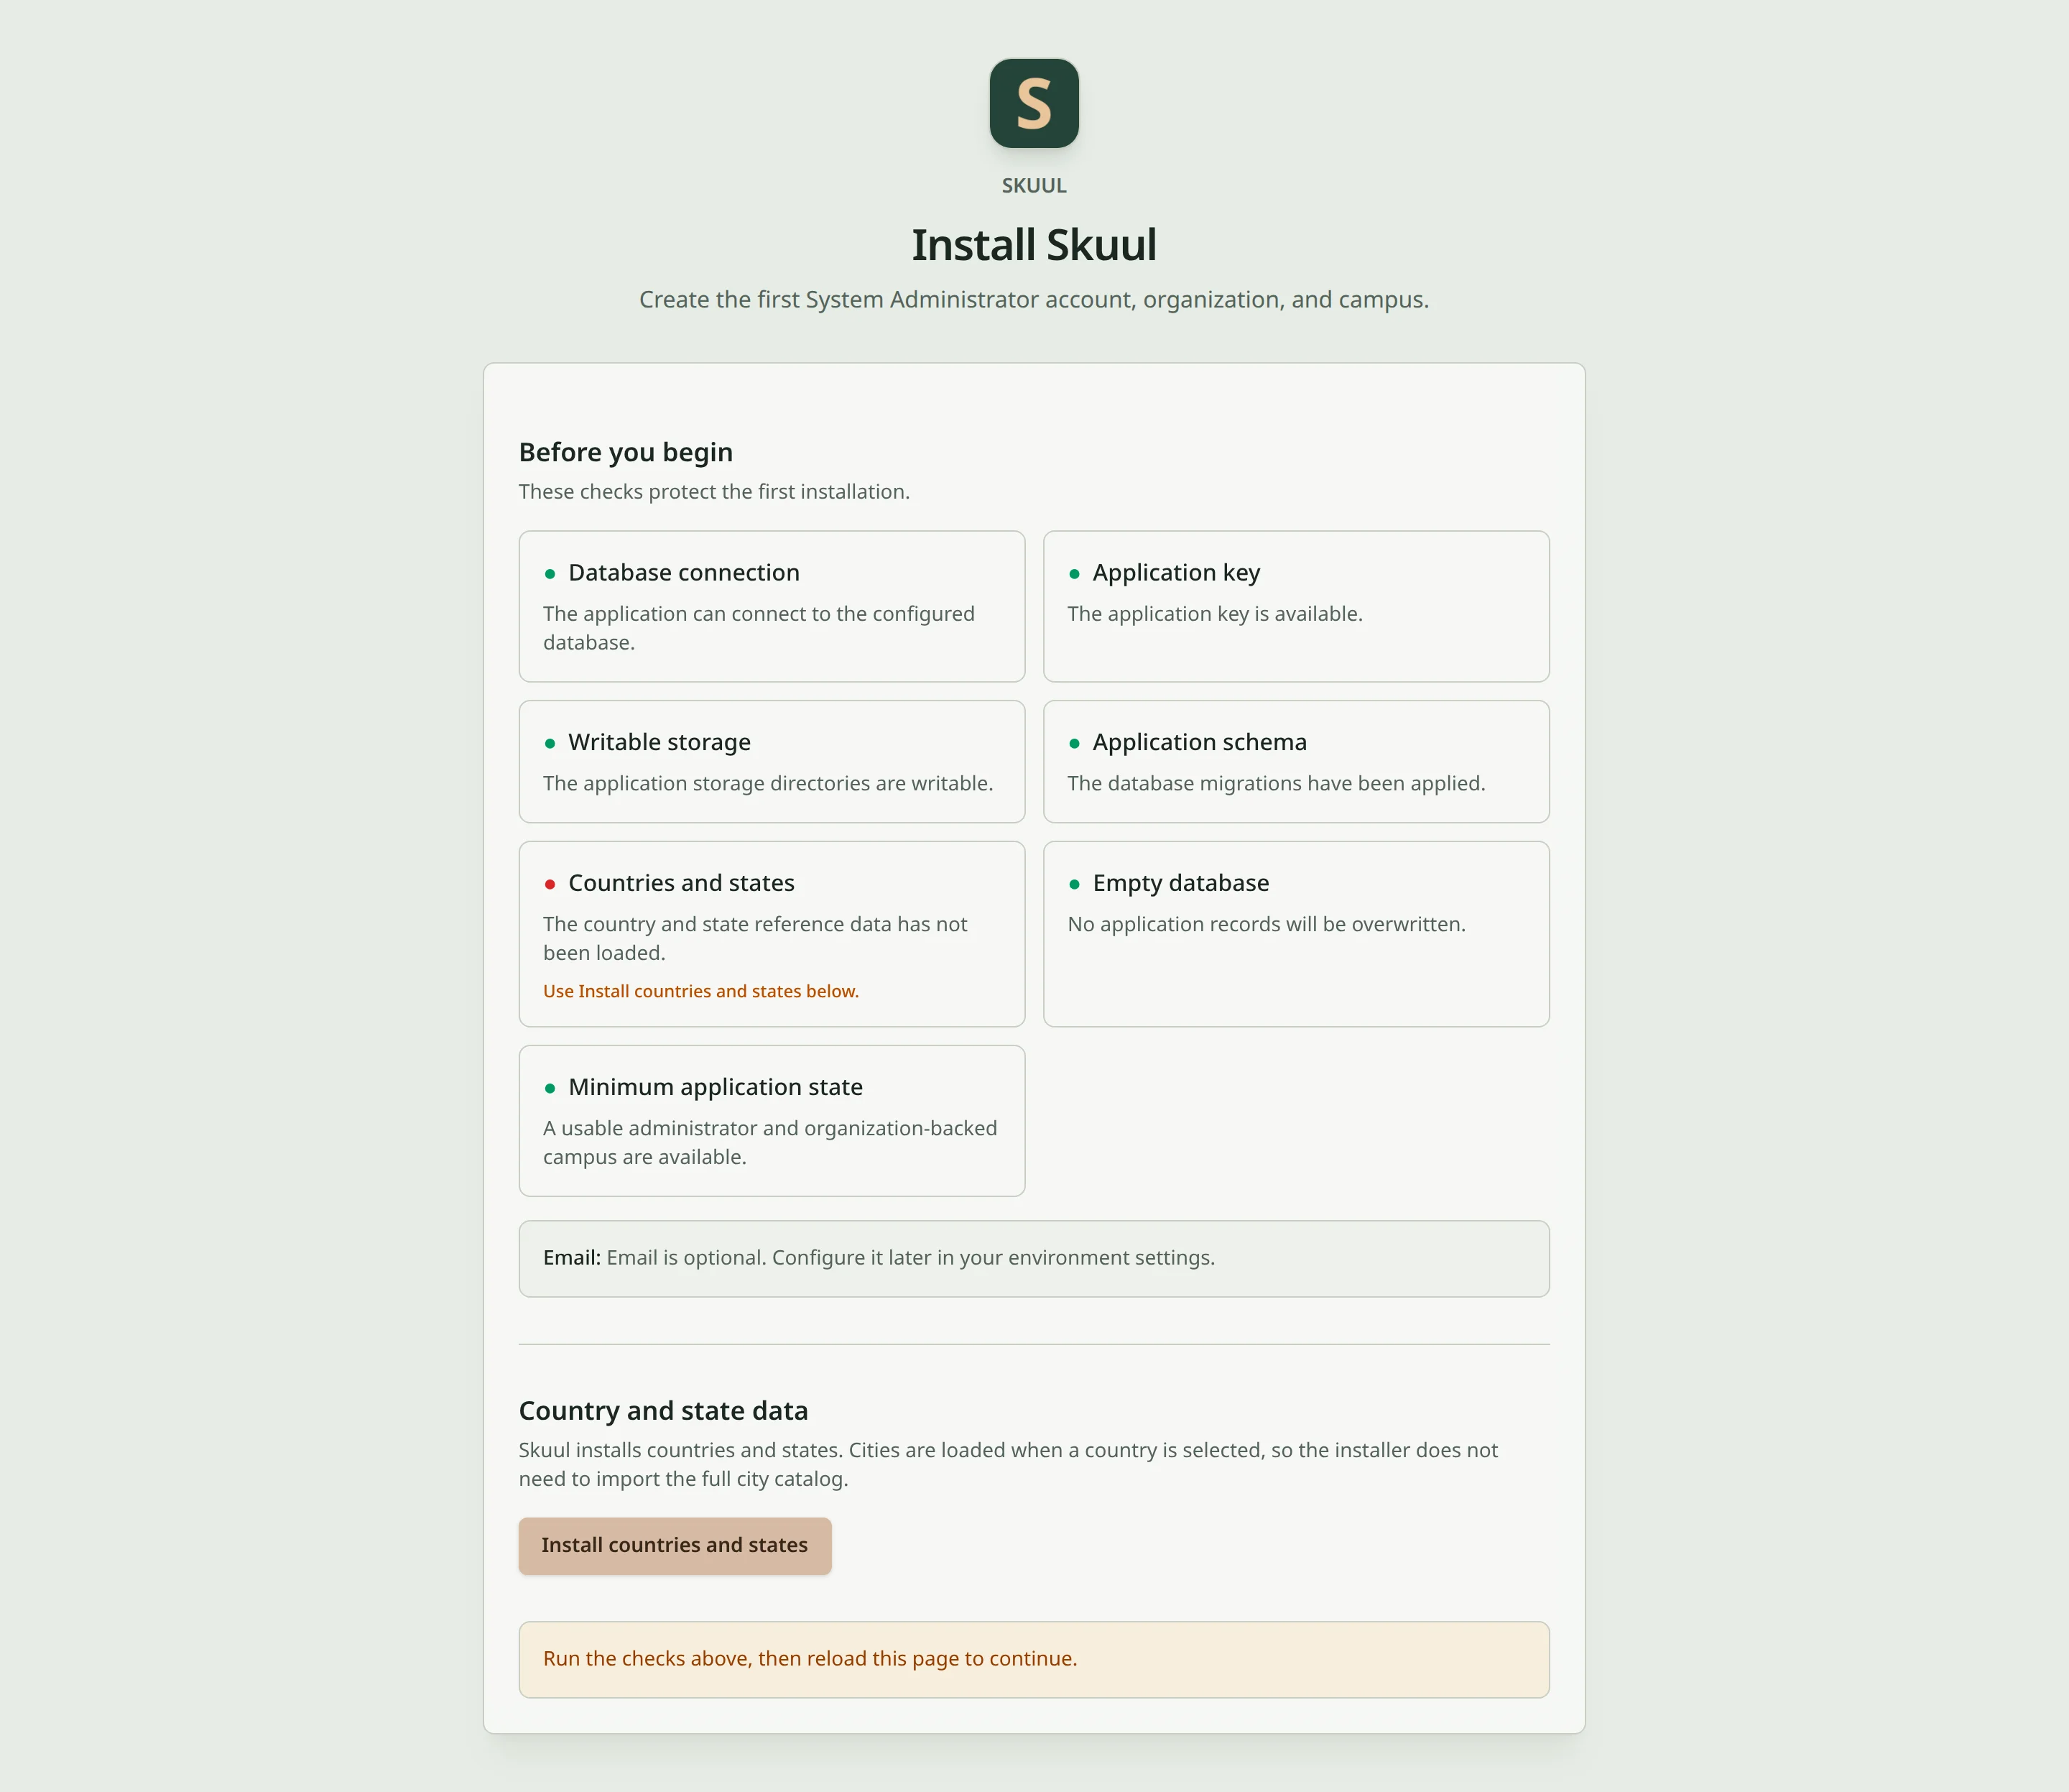
A failed check shows its cause and, where possible, an action to fix it.
Enter your administrator name, email, and password.
Enter the organization and first campus details.
Choose the interface language and school terminology.
Leave demo data disabled unless this is a disposable evaluation database.
Submit the installer and sign in with the credentials you chose.
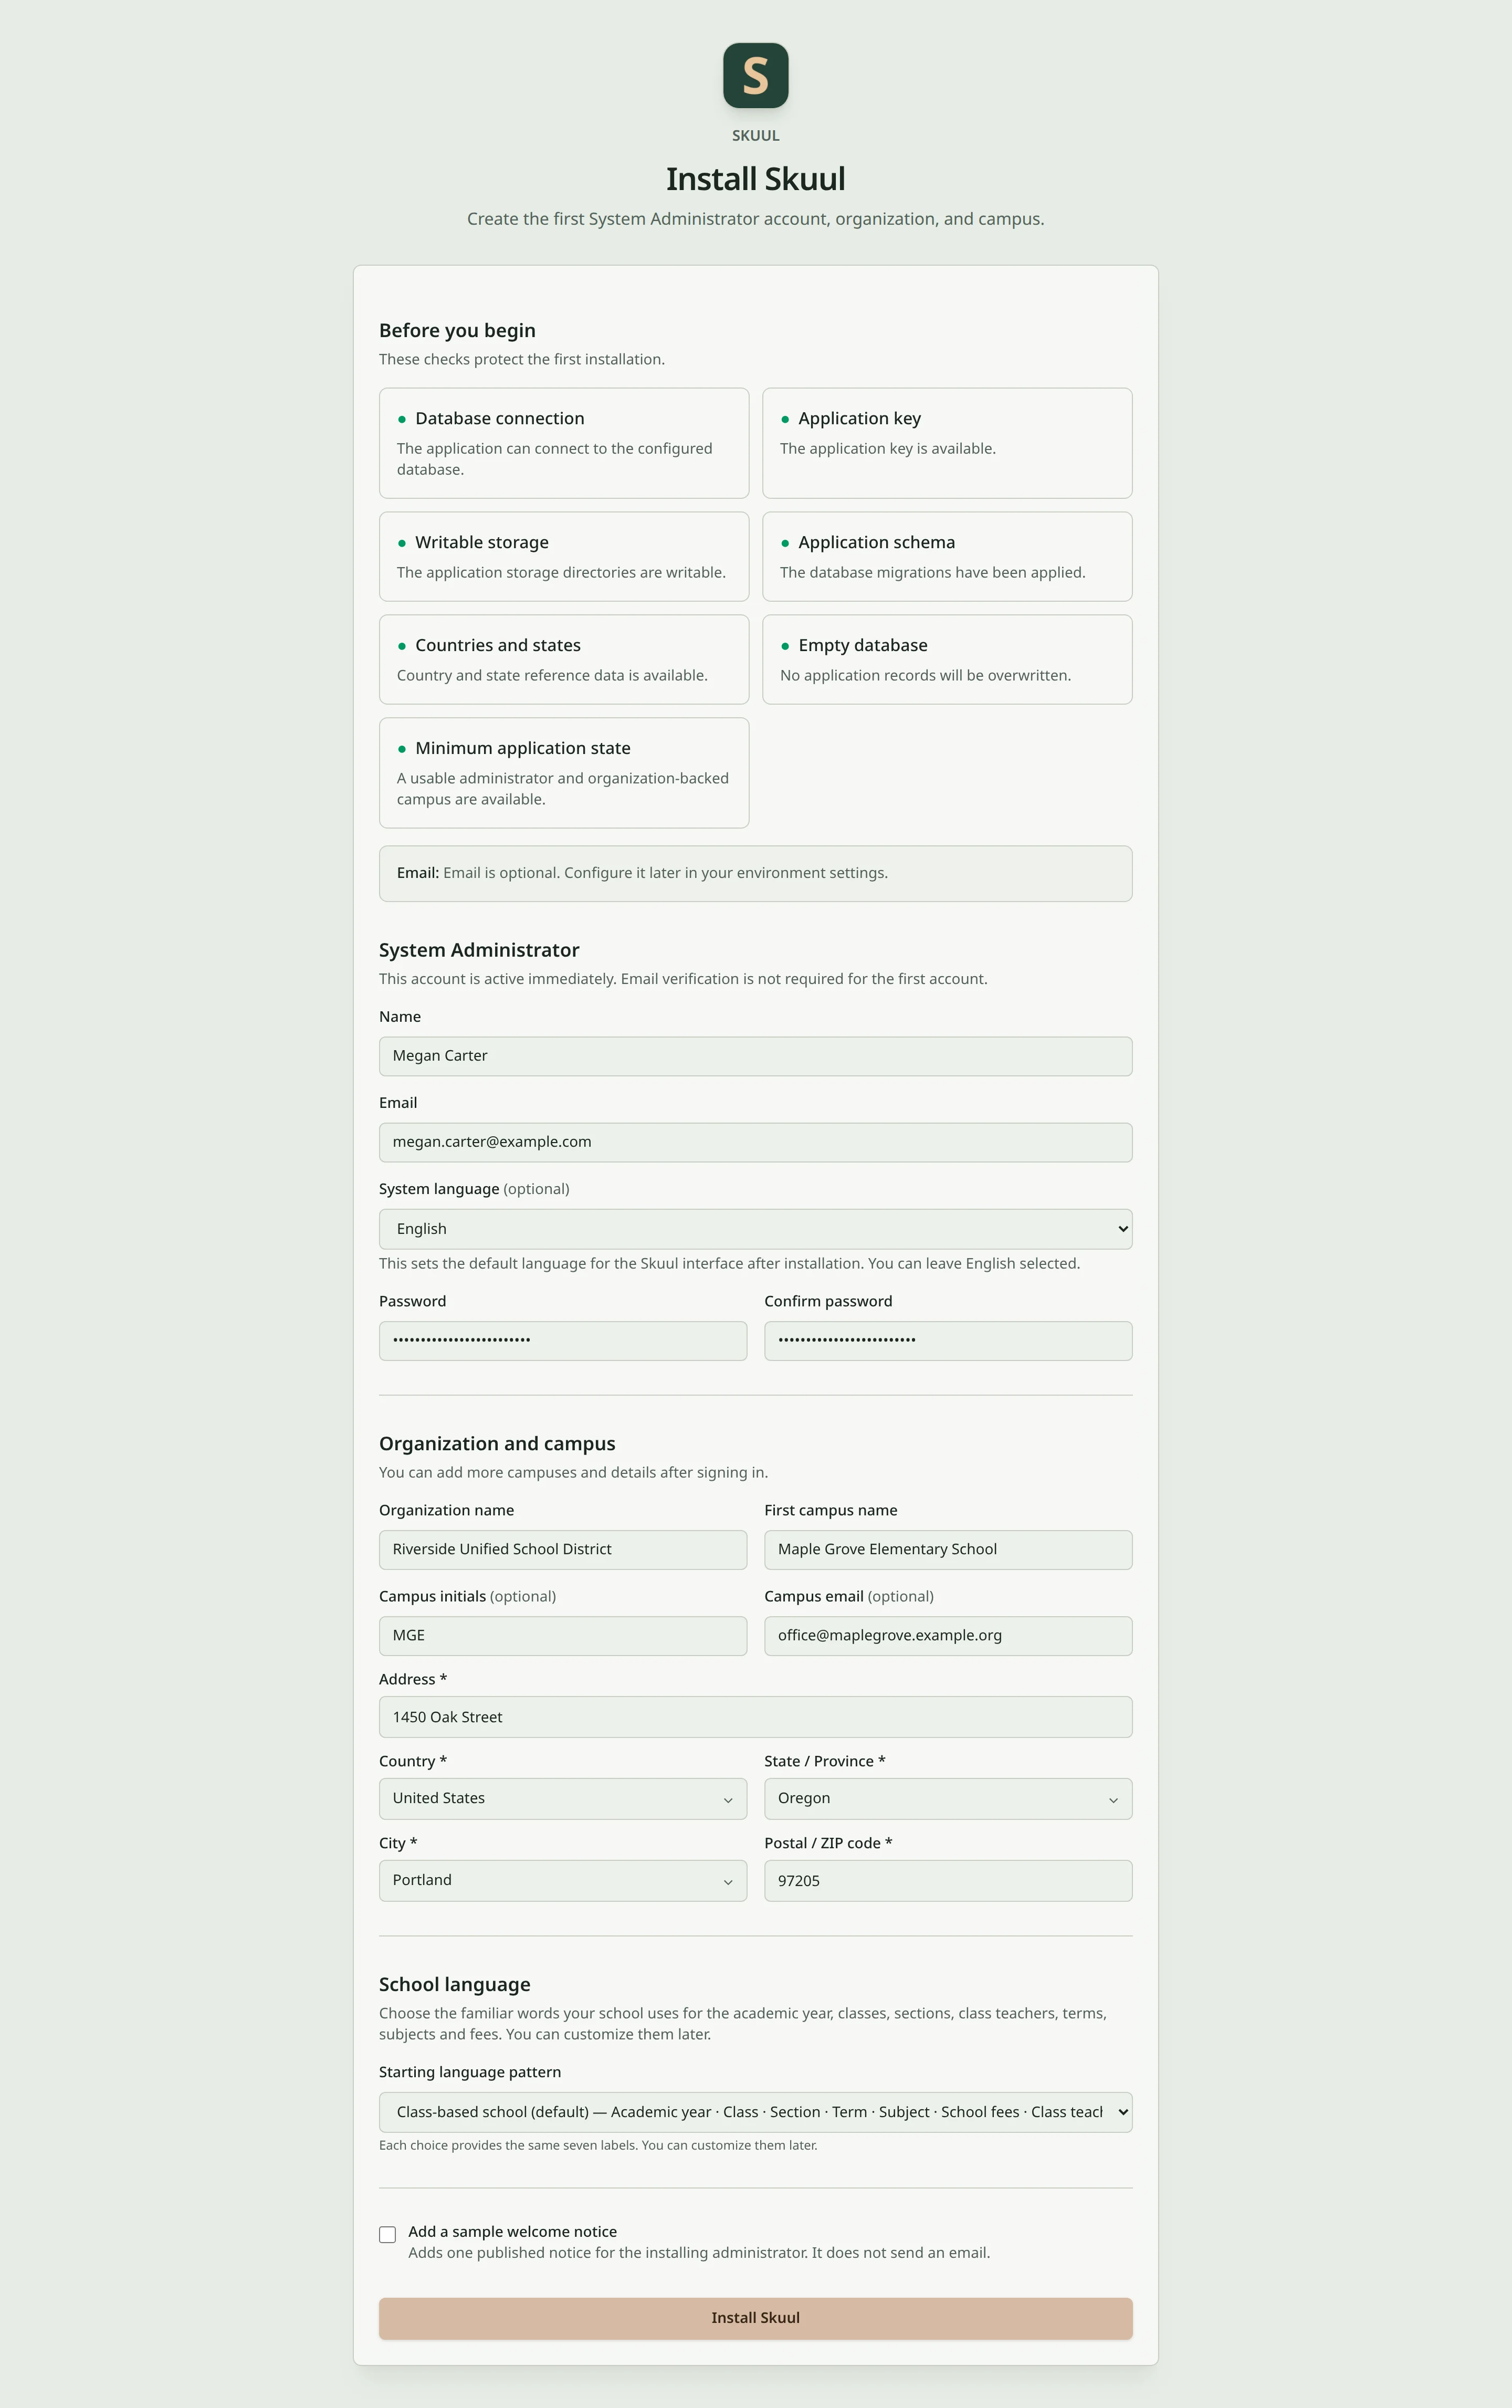
All checks pass and the form holds the administrator, organization, and first campus.
The installer loads the required roles and permissions and records completion. It requires an empty application database. Do not run the default database seeder first. It can create accounts that prevent a fresh installation.
The installer can recognize an existing installation with a usable administrator and campus. Follow updating for existing data; do not try to replace it with a fresh installation.
Complete school setup
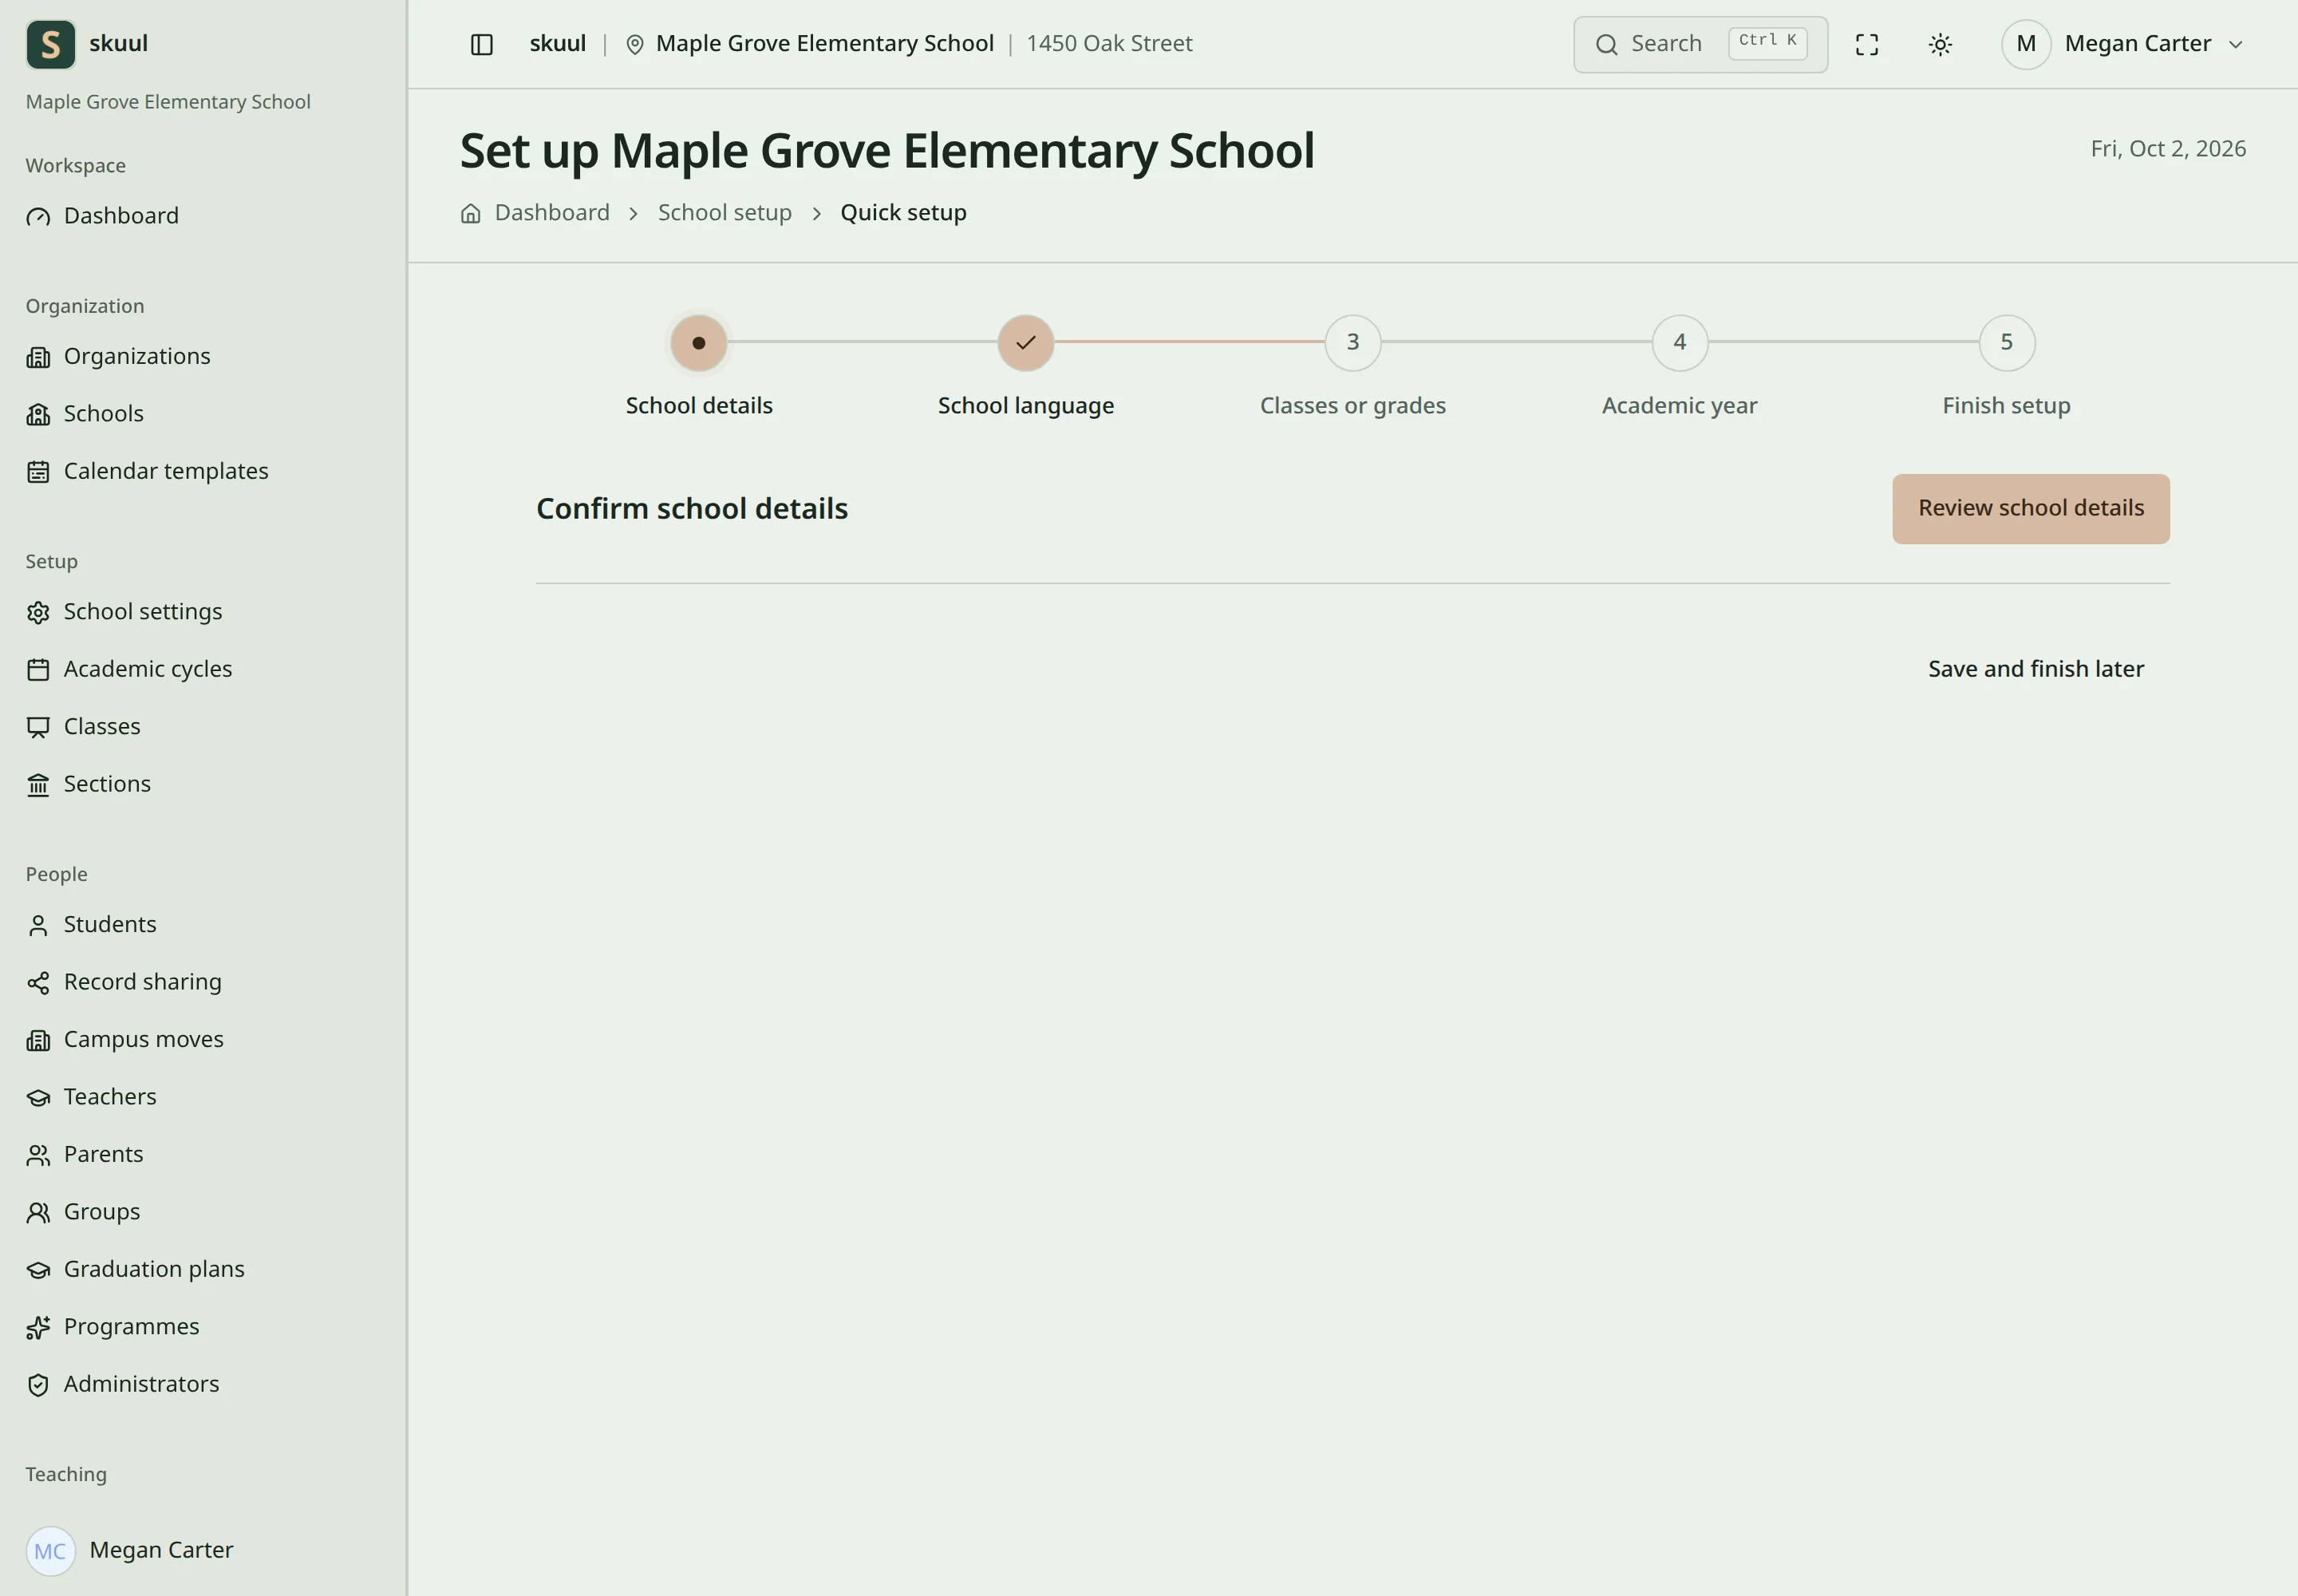
Quick setup guides you from school details to the first academic year.
Follow the setup checklist after signing in. Review the campus details and time zone. Create or select the current school year, reporting periods, teaching approach, classes, sections or course offerings, and grading scales. Then add staff and learners through the account and enrollment workflows.
Use the disposable demo guide when evaluating the hourly-reset demo. Keep demo mode disabled when retaining your local records.
Run background work
Run each command in a separate terminal:
vendor/bin/sail artisan queue:work --tries=3vendor/bin/sail artisan queue:work --tries=3vendor/bin/sail artisan schedule:workvendor/bin/sail artisan schedule:workFor frontend development, run vendor/bin/sail npm run dev. For a static asset build, run vendor/bin/sail npm run build again after changing frontend files. Stop the local services with vendor/bin/sail stop.